Lab 5: Command Line Tools
This lab will show you how to make use of some of the Command Line Utilities for troubleshooting Access Policy Manager when dealing with Authentication issues that you could experience.
Questions to ask yourself (LAB5)
- What should I expect in the Logs with Default Settings?
- Can I review the APM configuration from TMSH?
- Can I review Session Data from the CLI?
- How can I test if the AAA server responds to Authentication Tests using CLI Tools?
- How can I test if the AAA server respond to Query Tests using CLI Tools?
- How can I change the Logging Level for more Verbose details?
- How can I use iRules for Troubleshooting Assistance?
- How can I use TCPDump for Troubleshooting Assistance?
What’s Not Covered but we will discuss
- VDI Troubleshooting/Debug Logging
- SAML Troubleshooting Tools – SAML Tracer (Not CLI based)
Checking APM Logs
APM Logs by default show the same information you can get from the Manage Sessions menu, as well as APM module-specific information.
Access Policy Manager uses syslog-ng to log events. The syslog-ng utility is an enhanced version of the standard logging utility syslog.
The type of event messages available on the APM are:
| Event Messages | File Location | Description |
|---|---|---|
| Access Policy Events | /var/log/apm | Access Policy event messages include logs pertinent to access policy, SSO, network access, and web applications. To view access policy events, on the navigation pane, expand System menu and click Logs. |
| Audit Logging | /var/log/audit | Audit event messages are those that the APM system logs as a result of changes made to its configuration. |
When setting up logging you can customize the logs by designating the minimum severity level or log level, that you want the system to report when a type of event occurs. The minimum log level indicates the minimum severity level at which the system logs that type of event.
Note
Files are rotated daily if their file size exceeds 10MB. Additionally, weekly rotations are enforced if the rotated log file is a week old, regardless whether or not the file exceeds the 10MB threshold.
The default log level for the BIG-IP APM access policy log is Notice, which does *not* log Session Variables. Setting the access policy log level to Informational or Debug will cause the BIG-IP APM system to log Session Variables, but it will also add additional system overhead. If you need to log Session Variables on a production system, F5 recommends setting the access policy log level to Informational temporarily while performing troubleshooting or debugging.
We need to add some more actions to the APM Profile in the VPE we have been working with to go along with the next few lab tests.
STEP 1
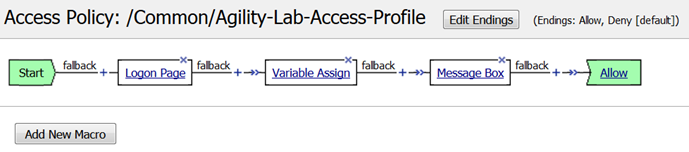
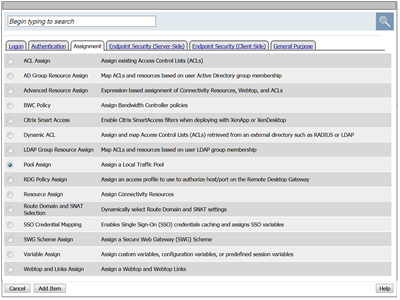
- Open the VPE and add a new AD Query action after the first Message Box action by selecting the + sign that follows.
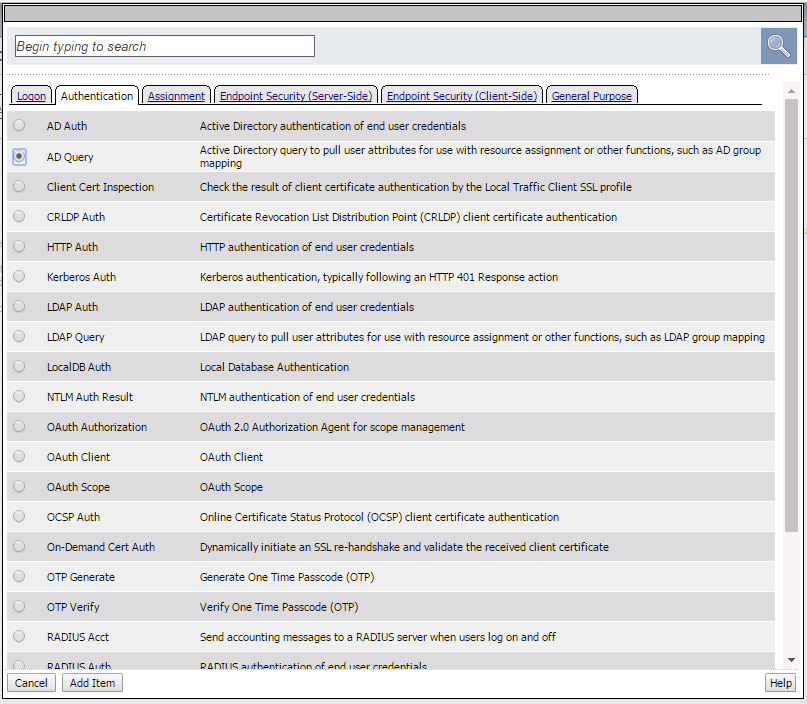
- Navigate to the Authentication tab and select the AD Query radial and click Add Item.
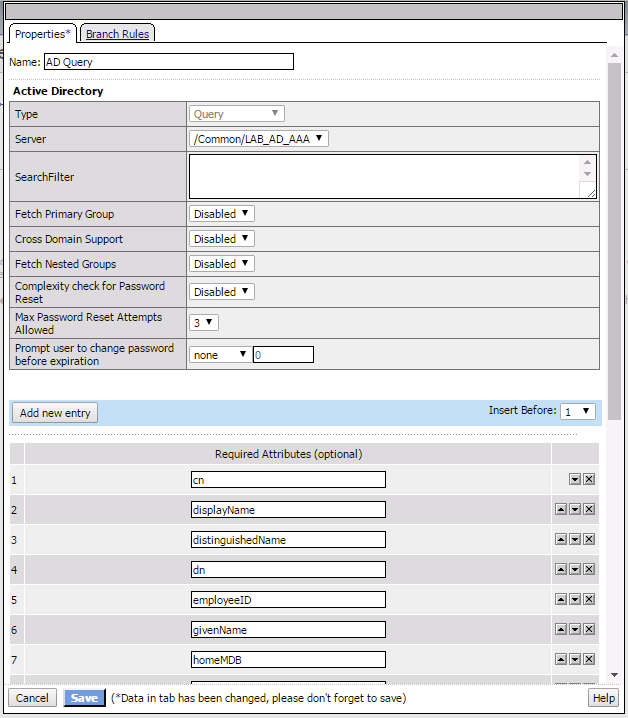
- In the AD Query, use the drop-down dialog box on Server to select the /Common/LAB_AD_AAA server. Click the Save button.
- On the top branch following the AD Query action, add another Message Box.
Hint: A Message Box can be added by clicking the + sign, navigating to the General Purpose tab and selecting Message Box

- After the second Message Box add the AD Auth action from the Authentication tab
Hint: An AD Auth action can be added by clicking the + sign, navigating to the Authentication tab and selecting AD Auth
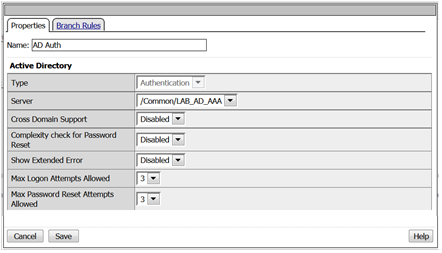
- In the AD Auth properties window use the server drop-down menu to select /Common/LAB_AD_AAA server.
- Click the Save button.

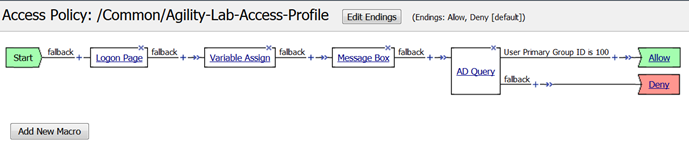
- Your policy should now look like this
Notice that one the top branch to the AD Query object the line reads User Primary Group ID is 100 (See graphic in Step 8 above, just after AD Query). Maybe you do not want to query for that information and would prefer to delete that branch. You must be *careful* in what you select or do when deleting that branch when you have other actions following it in the policy or they could be deleted when you do not want them to be deleted. Here is a trick you can use to preserve the actions that follow the ad query when you need to delete a branch.

- Just before the second Message Box after the “User Primary Group ID is 100” and after the + symbol there is a double arrow symbol. This will allow us to swap portions of the policy that come after that ->>- double arrow to another location in the VPE policy.

- Click the ->>- double arrow.
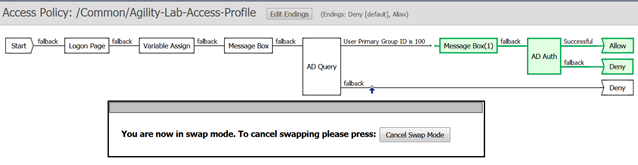
- You will now notice a vertical arrow pointing to other locations in the VPE where this section highlighted in green can be swapped.
- Click on the Vertical Arrow
- Now click the AD Query action in your policy and go to Branch Rules tab
- Click the X to the right in the gray box for the Branch Rule
- Click Save to save your settings

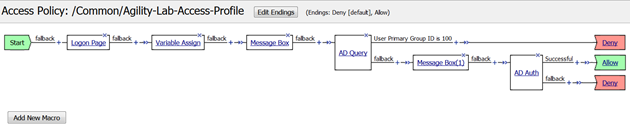
- Your policy should now look like this. Now you can see how the Swap function can help with moving action objects throughout the VPE

- Click Apply Access Policy to save and implement or work
Now let’s see what can be seen in the logs when set at the default logging level of Notice.
TEST 1
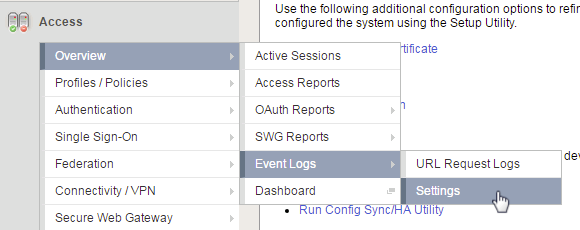
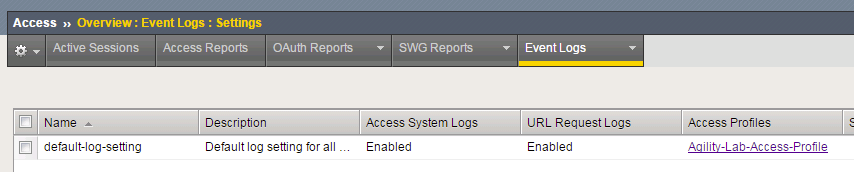
- Review the current Access Policy Logging (Access Overview Event Logs -> Settings)
- Select default-log-setting, then Click Edit to view settings.
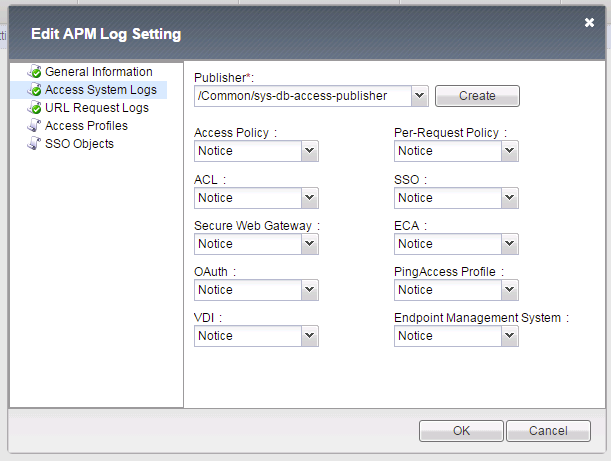
- Select Access System Logs
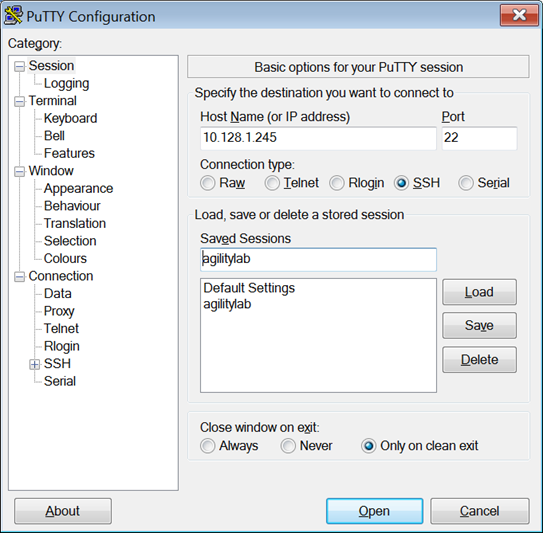
- Logon to the BIGIP APM console using an SSH client (PuTTY from your desktop). Select agilitylab > Load > Open
- Maximize your SSH window to reduce line wrapping when reviewing the logs from the CLI.
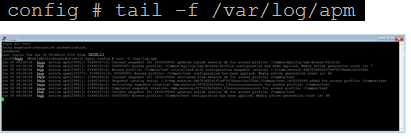
- From the CLI prompt, type tail –f /var/log/apm and hit Enter so you can start see the logs being displayed
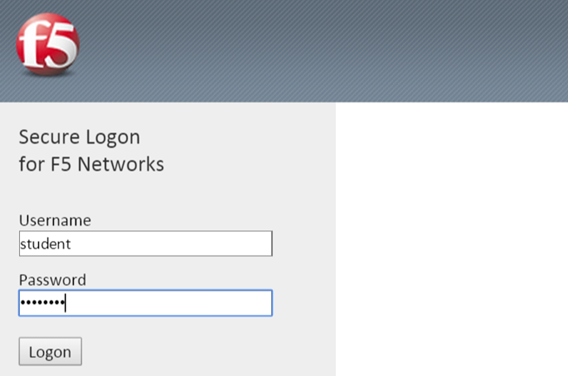
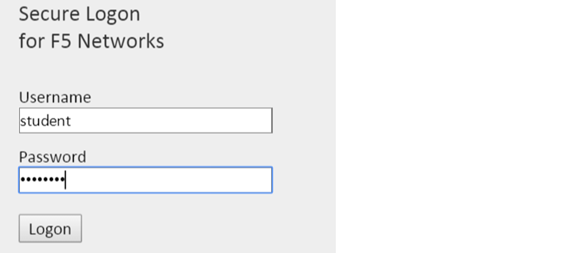
With the SSH console logging, open a browser and access the APM as the user student.
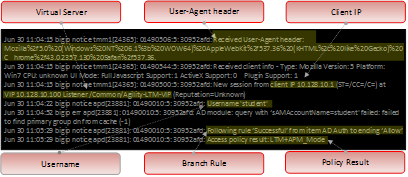
- Notice the logs being produced at the different stages of the users session as it first reaches the VIP, then when the user authenticates, receives message boxes or other policy actions, and then when the user reaches the policy result.
With the *default logging* level, there are no session variables being logged.
In the Next test we will turn up logging to Informational and restart the user session and then in the last test change logging level to Debug and notice the differences from Informational and Notice logging levels.
Turning up the heat on Logging
Now let’s test more verbose logging. You can step up from Notice to Informational and then to Debug if you want to see the differences yourself. For the purpose of this test though I will jump straight to Debug. You can use the GUI to make the log level changes to Debug or you could use the Traffic Management Shell (TMSH) command from the CLI to adjust the logging.
STEP 1
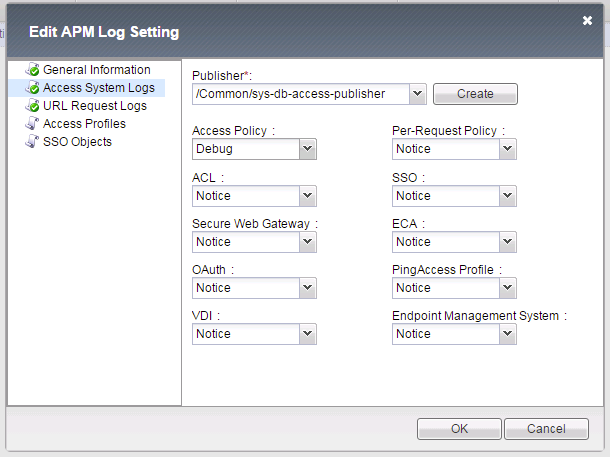
- Change Access Policy log setting to Debug (Access -> Overview Event Logs Settings, select default-log-setting, then click Edit)
TIP: Make sure you change setting back to Notice when not troubleshooting. High levels of logging not only consume more disk space, but also consume other resources, such as CPU, when enabled.
TEST 2
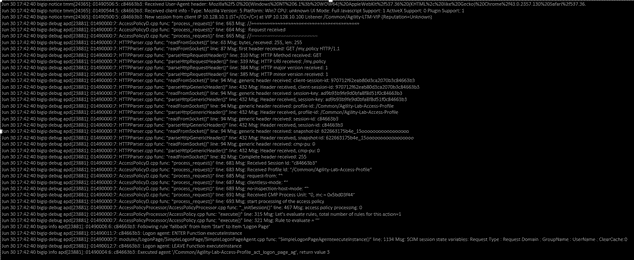
- Once you have the logging level increased restart you user session with the browser to the APM VIP and walk through the policy message boxes and other actions taking note of the additional verbosity in the logs you see in the SSH terminal window.
For sake of saving space in this document we will not include the screen shots showing the Informational and Debug logging messages and allow you to experience that yourself during your tests.
SessionDump Command
SessionDump is a command line utility that shows sessions and their associated session variables (like GUI Reports)
The sessiondump command has sever switches that can be used and you can further enhance your troubleshooting by additionally using other CLI utilities like grep to help filter the results to certain information. As you can see from the examples below, the first command simple provides all keys to be dumped for any/all user sessions while the second using grep allows you to filter the output to those associated with a given username. Refer to the screen shots below if you need additional detail.
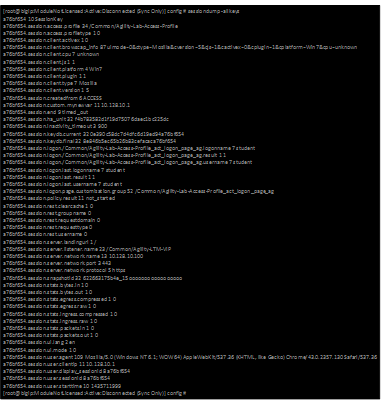
This first example uses just the –allkeys switch.
sessiondump –allkeys

This second example also uses the –allkeys switch. However, it also adds the |grep command to search for the “username”
sessiondump -allkeys | grep ‘student’
STEP 1

- On the command line, if you still had the tail command showing logging then stop that now by typing CTRL-C

Remember back in previous labs we learned that Session Variables cannot be displayed in the Reports screens if the User Session is not in an *Active* state. Well that is the same with the CLI sessiondump utility. There must be active sessions through APM in order to dump details.
- Once you are at the command prompt again try using the sessiondump –allkeys command first. Did you receive any data after running the command? If not, then why?
- If all your previous sessions have expired then startup and new session as a user and logon to APM and click through the message boxes.
- Now on the console type: sessiondump –allkeys. You should see a long list of information.

Compare that with running: sessiondump –allkeys | grep student You should then only see the lines that had the username you specified in the command to be returned
Now let us have some fun with using this utility to help with SSO troubleshooting/validation.
STEP 2

- Edit the VPE for the Agility-Lab-Access-Profile policy we have been working with.

- Add two new actions to the policy after the AD Auth on the successful branch.
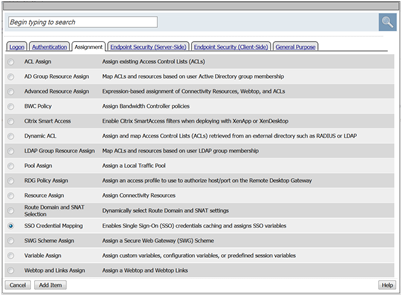
- First after AD Auth add the SSO Credential Mapping action from the Assignment Tab. Click Add Item
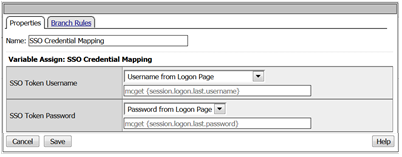
- Keep the default settings and click Save.
- Next add after the SSO Credential Mapping action add a Pool Assign action from the Assignment tab.
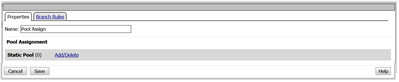
- In the next window click the Add\Delete link.
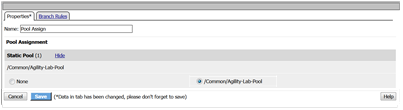
- Then select the radio button for /Common/Agility-Lab-Pool. Now click the Save button.

- Then click Apply Access Policy link on top left of page.
TEST 2
- Restart a new APM user session. Logon and follow through all the policy actions
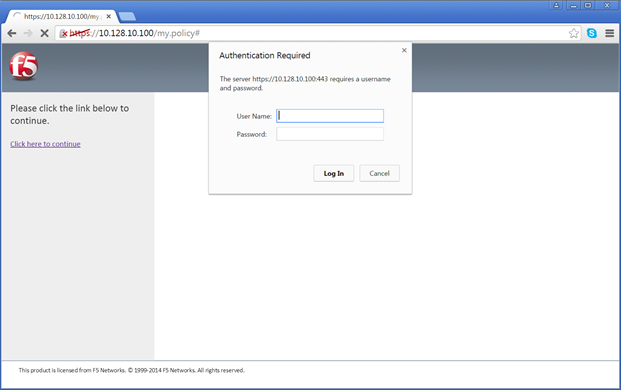
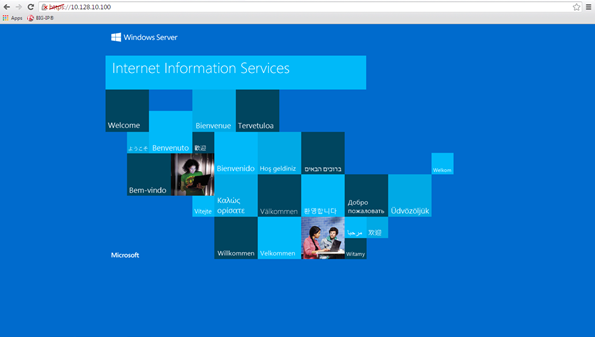
- This time instead of seeing a browser error you should be getting prompted for authentication for a website which is the site being hosted on the pool member that we assigned to the policy. Why are we getting prompted for authentication though? Did we not add the SSO Credential Mapping to the policy as well?

- Let’s use the following command at the console to check if we are getting credentials mapped to token variables properly: sessiondump –allkeys | grep ‘sso’ You should see two lines that show something like this following picture.
If you see the two lines with session.sso.token.last, then we know the credential mapping is happening and the username should be displayed accordingly. So what’s missing?
STEP 3
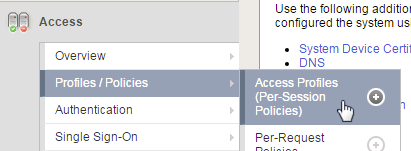
- Next go to the Access Policy menu, click on Access -> Profiles/Policies -> Access Profiles (Per-Session Policies) .

- In the list of access profiles, click the NAME of your access profile, Agility-LAB-Access-Profile

- When this page opens, look at the top, there are four tabs, click the SSO / Auth Domains tab
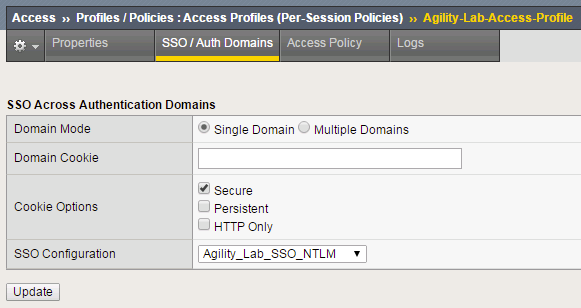
- On this page, use the drop down menu on the SSO Configuration row to select Agility_Lab_SSO_NTLM. Then click Update

- Then click Apply Access Policy on the top left of the page and apply the policy on the next page.
TEST 3
- Restart your user session again to the VIP and logon and click through the actions.
If necessary, you can kill your existing session by navigating to Access Policy Manage Sessions, then select the user/session and Click Kill Selected Sessions
- Now what do you see when the policy has completed? Are you seeing the web application without being prompted for an additional logon prompt from the application? If so, then you were successful.
ADTest Tool
In this section we will get familiar with anther CLI utility to assist in verifying proper authentication and query capabilities to an Active Directory domain. We need to prepare for this lab by making a quick change to the BIGIP’s configuration.
STEP 1
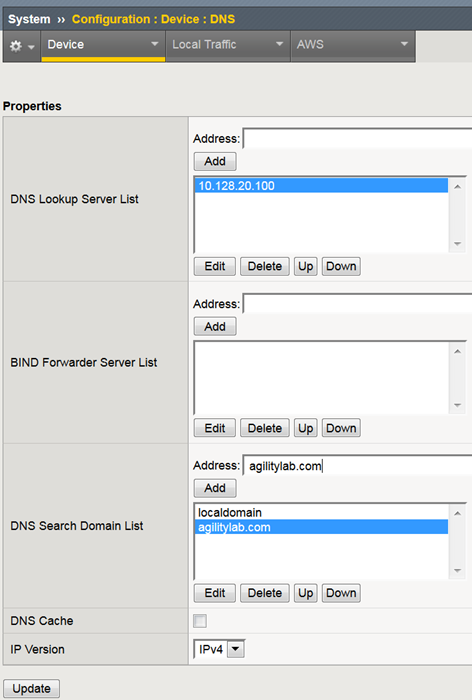
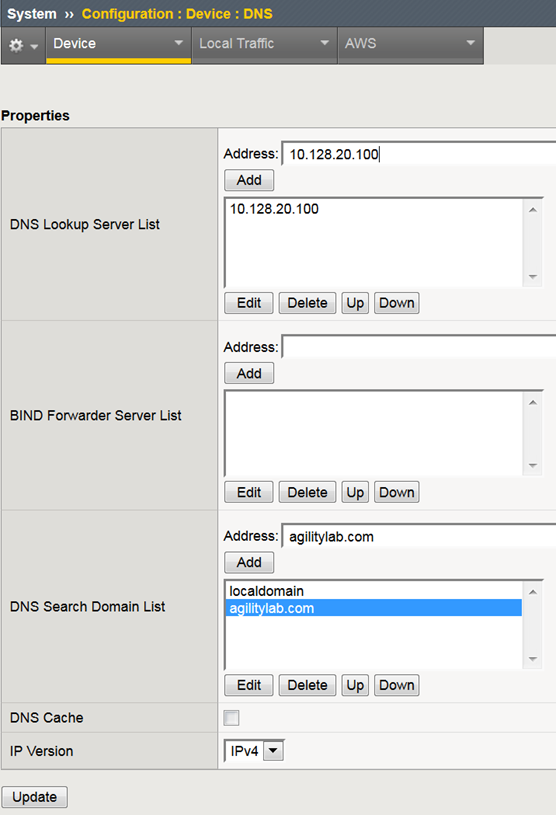
- Navigate to System > Configuration > Device DNS
- Highlight 10.128.10.100 in the DNS Lookup Server List and click Delete.
- Also highlight and Delete the DNS Search Domain List of agilitylab.com
- Click the Update button.
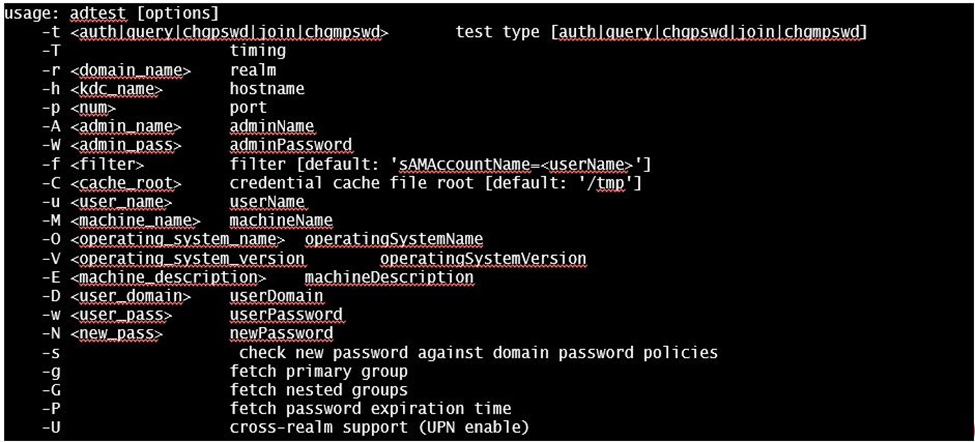
The /usr/local/bin/adtest utility is a test tool for APM’s Active Directory Module
| tYPICAL USAGE | |
|---|---|
| Auth Test with Administrative username & password (not necessary) |  |
| Auth Test without just username and password |  |
| Query Test With Administrative username and password |  |
The ADTest tool can help point out potential issues with a BIG-IP’s configuration or interoperability issues on the server’s side.
| COMMON ERRORS | |
|---|---|
ERROR: query with ‘(sAMAccountName=student)’ failed in krb5_get_init_creds_password(): Preauthentication failed, principal name: administrator@agilitylab.com (-1765328360) Test done: total tests: 1, success=0, failure=1 |
The cause of this is simply failed administrative credentials while attempting a query |
ERROR: query with ‘(sAMAccountName=student)’ failed in ldap_sasl_interactive_bind_s(): Local error, SASL(-1): generic failure: GSSAPI Error: Unspecified GSS failure. Minor code may provide more information (Cannot find KDC for requested realm) (-2) Test done: total tests: 1, success=0, failure=1 |
The cause of this is typically failed DNS resolution |
Refer to the screen shots below if you need additional information regarding the options of ADTest.
TEST 1
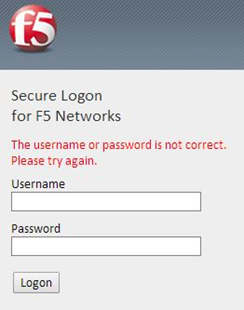
- Try logging on to the VIP as a user again after removing the DNS entries. You will notice that your logon will likely fail and you will receive the following screen.

- Review the session details for this logon session in reports or manage sessions. As we can see from the session details the AD Query is failing as well as AD Auth

- Now we can test from the console. Open a console/ssh session. Using the following command let us first test authentication using the ADtest utility. adtest -t auth -r “agilitylab.com” -u student -w password. What result did you get with that test?

- Now let’s try a query test. adtest -t query -r “agilitylab.com” -A Administrator -W adminpass -u student -w password. What result was returned?
- Go back to the DNS Settings section and re-add the DNS server IP and domain. Then re-test the Auth and Query using the ADtest utility.
iRules Logging Assistance
As many know one of the most useful features of F5 BIGIP TMOS is the flexibility provided by iRules.
With APM and iRules you can accomplish many things, in fact you can now use iRules to create APM sessions. We are not going to go over that here however for the purpose of how iRules can be used for troubleshooting we will provide some highlights.
Often you can run into problems wherein an application single sign-on is not being processed and completing as it should. What happens as a result of the initial setup not working im/_static/class4tely is that many people start second guessing what is happening as traffic passes from the clients browser, to the front client side of the BIGIP VIP, then what F5 VIP is actually able to SEE, next What does LTM see, APM see, what is being passed along the way at each stage of the transaction through the BIGIP, and of course what does the BIGIP APM then forward to the Backend Server Application and How does that Backend Server Application respond? Fortunately, iRules can be very beneficial in this process to collect and subsequently log specific data at each stage which greatly enhances the troubleshooting capabilities.
We all know that TCPDump can be your friend in capturing data to analyze however at times the application workflows between client f5 and server and encryption along the way can hamper what TCPDump could capture for analysis. Another issue with TCPDump is that is captures a lot of data that then needs to be analyzed. Granted TCPDump provides a filtering capability to weed through that extra data however when you compare it to using some targeted iRules to collect APM session variables and data to be output to logs it makes it easier to review the application flow more specific to the steps you are trying to validate.
By default, APM in the current code release automatically secures that variables that are entered into the logon page on APM. Furthermore, the password is hidden from the reports screen session variable view and hidden from the database. Yet there are times when the Admin of the APM may need to have access to the decrypted password to either verify that the correct information is being keyed by user, received by APM and sent from APM to servers. Fortunately, there is a way using an iRule to do just this for our troubleshooting purpose.
TEST 1
- First open a console session to the BIGIP.
- From the command prompt type: tail –f /var/log/ltm
- Hit the enter key several times to move the text on the screen up to the top so you have a clear screen to start reviewing log data during this test.
- Now open a browser and access the APM VIP and logon as a user.
- When you reach the end of your APM policy take a look at the console session and note whether or not the logs provide any details about the username or password you just used to logon to APM.
- Now in another browser open the APM Admin GUI.
- Go to the reports screen and run the All Sessions Report.
- Open the Session Variables link for the current session you have just started as the user.
- Navigate down to the SSO folder and expand it.
- Review the SSO Token Username and verify it displays the username you entered.
- Review the SSO Token Password and verify it displays the password you entered. Or can you?
- No, you cannot because it is obscured by default.
Next, we will implement an iRule to assist the Admin in verifying what password is being entered by the user.
An iRule has been created already and supplied for you so you won’t need to create it yourself you only need to apply it to the Virtual Server under the Resources Tab.
STEP 2
- Open the properties for the Virtual Server.
- Click the resources Tab.
- In the iRules section, click the Manage button.
- In the right-side box scroll down to find the iRule named Agility-201-Troubleshooting
- Highlight the iRule and click the arrow button to move it to the left box.
- Click the finished button.
TEST 2
- Navigate to Manage Sessions and Kill all existing sessions.
- In the console screen, hit the enter key several times to move any existing output up to the top of the window, then enter the following command tail –F /var/log/ltm
- In the browser for user session testing, restart the session back to the APM VIP and logon with your username and password.
- Click through to the end of the policy.
- Now go back to the console session and review the log messages.
- Do you see the username you entered in the logon page?
- Do you see the password you entered in the logon page? If you answered yes then you were successful. Congratulations!
TCPDump Troubleshooting Assistance
Beginning in BIG-IP 11.2.0, you can use the “p” interface modifier with the “p” modifier to capture traffic with TMM information for a specific flow, and its related peer flow. The “p” modifier allows you to capture a specific traffic flow through the BIG-IP system from end to end, even when the configuration uses a Secure Network Address Translation (SNAT) or OneConnect. For example, the following command searches for traffic to or from client 10.128.10.100 on interface 0.0:
tcpdump -ni 0.0:nnnp -s0 -c 100000 -w /var/tmp/capture.dmp host 10.128.10.100
Once tcpdump identifies a related flow, the flow is marked in TMM, and every subsequent packet in the flow (on both sides of the BIG-IP system) is written to the capture file.