Lab 1: APM Troubleshooting Lab Object Preparation (GUI)
Note
You only need to perform EITHER Lab 1 OR Lab 2. They accomplish the same goal, but using different methods. Lab 2 gets the Lab Preparation using TMSH
The purpose of this lab is to preconfigure some objects that will be used throughout the other labs. These objects are as follows:
- Domain Name Services (DNS) Resolver
- Network Time Protocol (NTP) Server
- Access Policy (APM) AAA Server – Active Directory
- Access Policy (APM) SSO Configuration – NTLMv1
- Access Policy (APM) Access Profile
- Local Traffic (LTM) Pool and Member
- Local Traffic (LTM) Virtual Server
Connect to the Lab
- Establish an RDP connection to your Jump Host and double-click on the
BIG-IP Chrome shortcut on the Windows desktop.
- User: agility
- Password: Agility1
- Ignore the certificate warning.
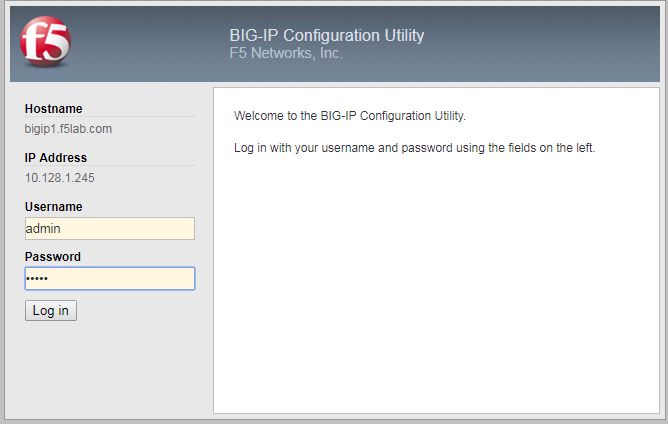
- Login into the BIG-IP Configuration Utility with the desktop icon (or
Favorite link in Chrome) with the following credentials:
- User: admin
- Password: admin
DNS Resolver for System Configuration

- Create a DNS entry by selecting: System->Configuration->Device->DNS
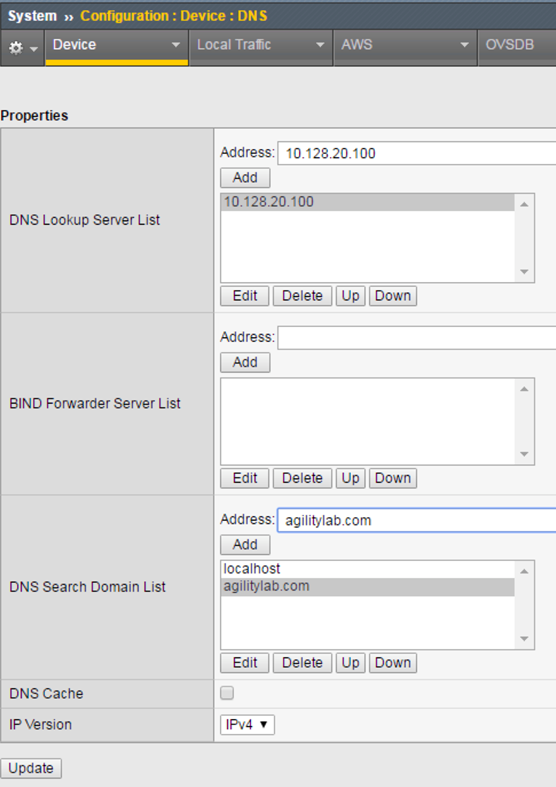
- In the Properties Section for DNS Lookup Server List, enter 10.128.20.100 in the Address field and click the ADD button.
- Scroll down to the DNS Search Domain List section and enter agilitylab.com in the Address field and click the ADD button.
- Click the UPDATE button at the bottom of the page to save the changes you just made.
NTP Server for System Configuration
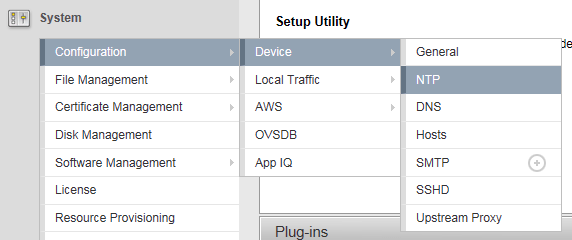
- Create a NTP entry by selecting: System Configuration Device NTP
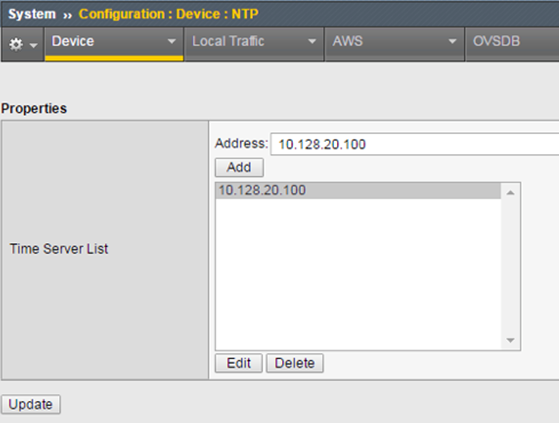
- In the Properties Section for Time Server List, enter 10.128.20.100 in the Address field and click the ADD button.
- Click the UPDATE button at the bottom of the page to save the changes you just made.
Access Policy (APM) AAA Server – Active Directory Object Creation
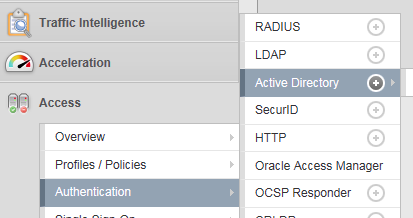
- Create a new AAA Server Object of type Active Directory by selecting: Access Authentication Active Directory

- Click the CREATE button on right side of page.
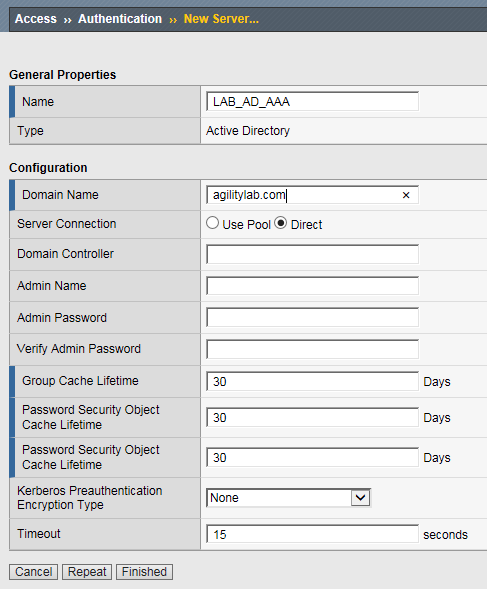
- Under General Properties type LAB_AD_AAA in the name field.
- In the Configuration Section, Click the radio button option next to Direct in the Server Connection row.
- In the Domain Name field enter agilitylab.com
- Leave the Domain Controller, Admin Name and Admin Password fields blank for now.
- Click the FINISHED button at the bottom of the page to save your changes.
Access Policy (APM) SSO Configuration – NTLMv1
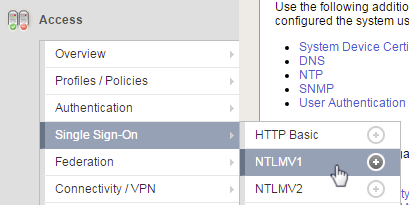
- Create a new SSO Configuration Object of type NTLM by selecting: Access Single Sign-On NTLMV1
- Click the CREATE button on the right side of the page.
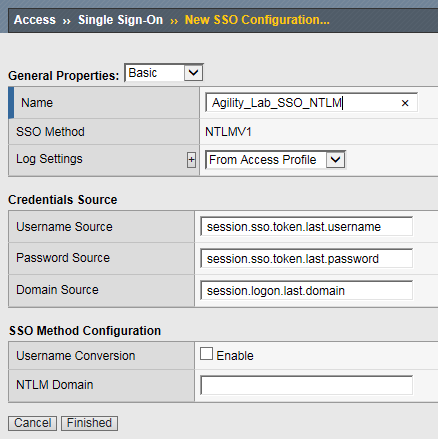
- In the Name field enter Agility_Lab_SSO_NTLM
- Click the FINISHED button at the bottom.
Access Policy (APM) Access Profile Creation
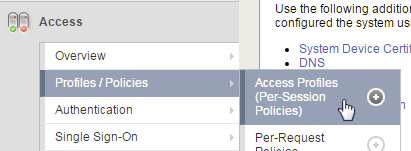
- Create a new APM Profile Object of type ALL by selecting: Access Profiles/Policies Access Profiles (Per-Session Policies)

- Click the CREATE button on the right side of the page.
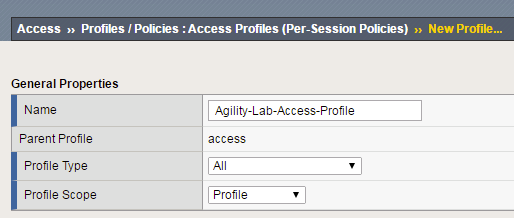
- In the Name field enter, Agility-Lab-Access-Profile
- In the Profile Type drop down list select All
- In the Profile Scope drop down list select Profile
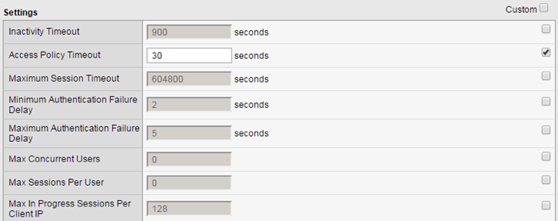
- In the Settings section click the checkbox to the right of Access Policy Timeout and change the value from 300, to 30, seconds.
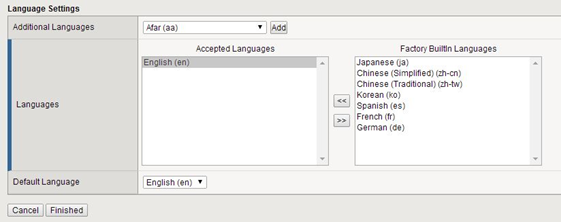
- Scroll the bottom of the page and in the Language Settings section, click to highlight English in the Factory Builtin Languages box, then click the left << arrows to move it to the left box labeled Accepted Languages.
- Click the FINISHED button at the bottom of the page to save your changes.
Local Traffic (LTM) Pool and Member Creation
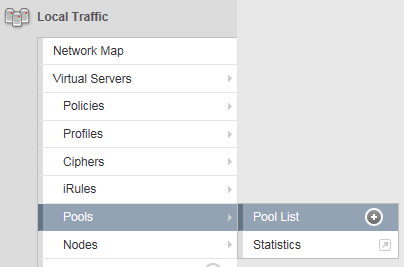
- Create a new LTM Pool and Member by selecting Local Traffic Pools Pools List
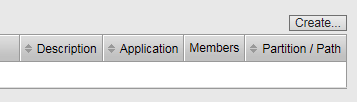
- Click the CREATE button on the right side of the page.
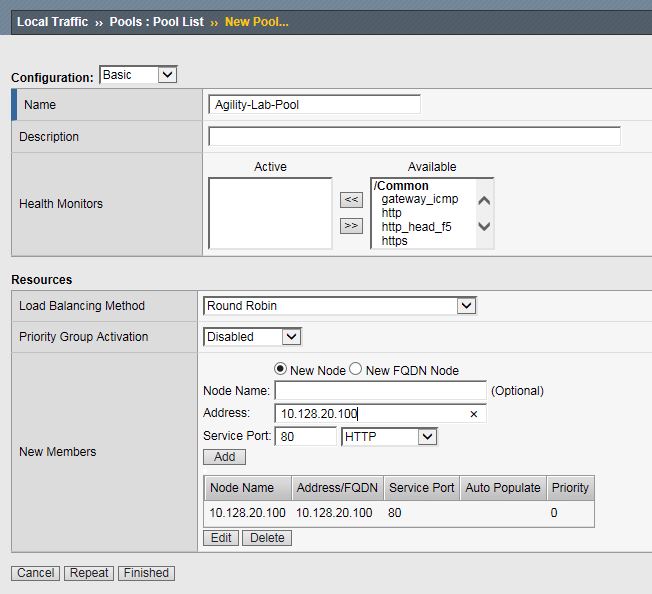
- In the Name field enter Agility-Lab-Pool
- In the Resources section, in the New Members area, enter 10.128.20.100 in the Address field.
- In the Service Port field, enter 80, or select HTTP from the drop-down menu.
- Click the ADD button
- Click the FINISHED button at the bottom to save your changes.
Local Traffic (LTM) Virtual Server Creation
This lab will walk you through creating the Virtual Server we will use during the course of the lab. This Virtual Server will be used to associate Access Policies which will be evaluated when authenticating users.
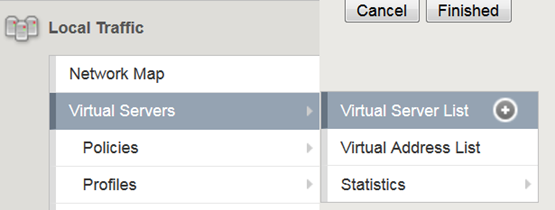
- Create an new Virtual Server by selecting Local Traffic Virtual Servers Virtual Server List

- Click the CREATE button on the right side of the page.

- Under the General Properties section, in the Name field enter Agility-LTM-VIP
- In the Destination Address field enter 10.128.10.100
- In the Service Port fields enter 443, or select HTTPS from the drop-down menu

- Under the Configuration section, in the HTTP Profile field use the drop-down menu to select http
- In the SSL Profile (Client) field select clientssl from the Available profiles then use the << left arrows to move it to the Selected box.
- Ensure VLAN and Tunnel Traffic is set to All VLANs and Tunnels
- In the Source Address Translation field select Auto Map from the drop-down menu.
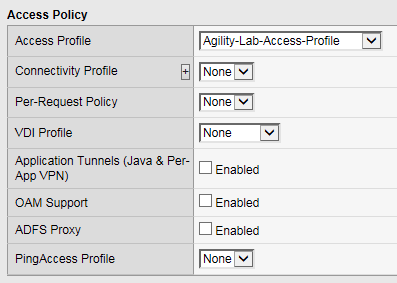
- Scroll down to the Access Profile section, select Agility-Lab-Access-Profile from the drop-down menu.

- Click the FINISHED button to save your changes.