Module: Deploy ADFS Proxy Services
In this module you will deploy ADFS Proxy functionality. The BIG-IP will perform the same role in front of ADFS as a Web Application Proxy (WAP) server does, supporting the protocol MS-ADFSPIP.
Change Client to Point at BIG-IP ADFS Proxy Virtual Server
- Double click the BIG-IP ADFS Load Balancer desktop shortcut
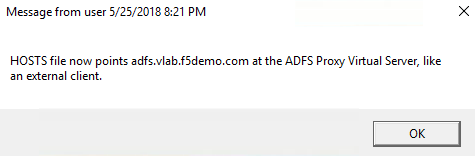
- You should see that the HOSTS file now points ADFS at the load balancing virtual server (which is not yet created)
- Close any open Chrome incognito windows
- Open a new Chrome window if not already open
- Right click the “ADFS Demo App” shortcut and open a new incognito window
- It should fail because you cannot access ADFS through the BIG-IP until you deploy the configuration.
- If it is still working, you may need to close Chrome and/or retry the HOSTS file shortcut.
Deploy ADFS iApp for ADFS Proxy (with MS-ADFSPIP support)
- Open the BIG-IP configuration interface
- Open iApps -> Application Services -> Applications
- Click Create
Accept all default values except for those listed below.
- Name: adfs-proxy
- Template: f5.microsoft_adfs.v1.2.0rc7
- Access Policy Manager (BIG-IP APM)
- Would you like to configure BIG-IP as an ADFS Proxy?
- Yes, configure BIG-IP as an ADFS Proxy
- What is the account to be used for establishing proxy trust with
ADFS?
- admin@f5demo.com
- What is the password associated with that account?
- admin
- Would you like to configure BIG-IP as an ADFS Proxy?
Establishing trust with ADFS requires username in UPN or domain\username format. This is true whether in the iApp or establishing trust manually.
- SSL Encryption
- Which SSL certificate do you want to use?
- internal-vlab.f5demo.com.crt
- Which SSL private key do you want to use?
- internal-vlab.f5demo.com.key
- Which SSL certificate do you want to use?
Note that this time we are doing SSL Bridging. This is required for the ADFS Proxy. Client certificate authentication can still be performed because BIG-IP supports MS-ADFSPIP.
High Availability
What IP address do you want to use for the virtual server?
- 10.1.10.100
10.1.10.x is the external/DMZ network in this environment. Notice this is .10 not .20 this time.
- Which FQDN will clients use to access AD FS?
- adfs.vlab.f5demo.com
- Which servers should be included in this pool?
- 10.1.20.6
- Click Add
- 10.1.20.7
- What Trusted CA would you like to use to validate the client
certificate chain presented during certificate authentication?
- F5demo-DC-CA.crt
This is the AD Certificates Services CA certificate for this environment that was used to issue the client certificates so that the client certificate auth can be verified. It was pre-imported for you.
- Click Finished
Test the ADFS Proxy Forms Authentication Functionality
- Close any open Chrome incognito windows
- Open a new Chrome window if not already open
- Right click the “ADFS Demo App” shortcut and open a new incognito window
If you do not get the ADFS logon page noted below wait 60-120 seconds for the ADFS servers to sync and try again. If you are still getting the error you may have cache problems. Double check that you have closed all other incognito windows before trying this, and you can clear cache and cookies by performing ctrl+shift+del and selecting “all time”.
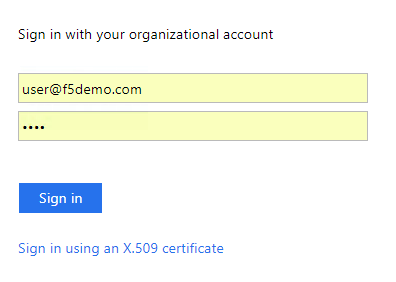
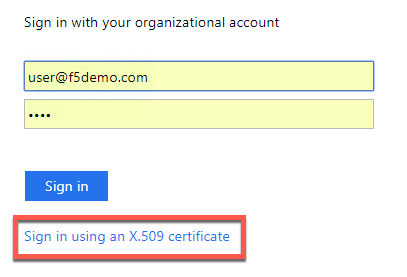
- This time instead of automatically authenticating with Windows
Integrated Authentication you are presented with a forms login page.
This is because ADFS is configured to require Forms auth for external
users.
- Username: user@f5demo.com
- Password: user
- Click Sign In
- You should see a set of claims displayed in the claims app at app.vlab.f5demo.com
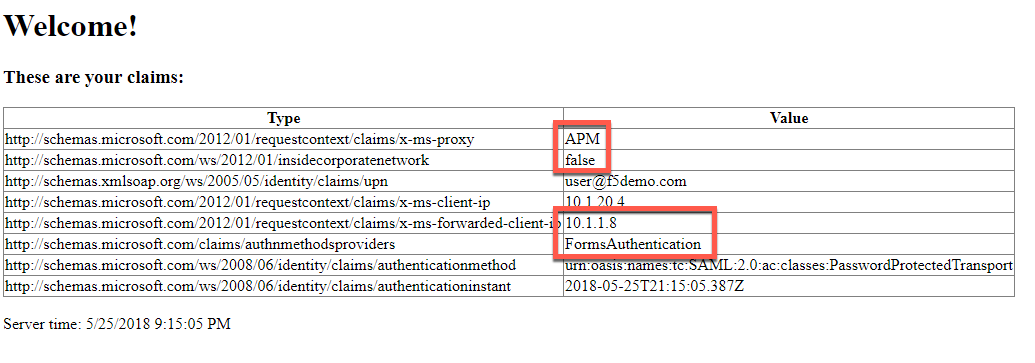
- Note that ADFS now identifies the user as outside the corporate network, knows that APM acted as an ADFS Proxy, knows the user’s true IP address, and that the user is now logging in with FormsAuthentication instead of WindowsAuthentication.
- What happened:
- You made a request to App
- App redirected you to ADFS for authentication
- The BIG-IP received the request and load balanced it to one of the ADFS servers, as well as communicated data about the traffic using MS-ADFSPIP.
- The ADFS server determined that you should be authenticated using the extranet policy and sent back a logon page which the BIG-IP forwarded on to you.
- You submitted the forms and ADFS authenticated with your credentials
- ADFS redirected you back to App with a WS-Fed assertion
- App validated the assertion and displayed the claims it received from ADFS
Test the ADFS Proxy Certificate Authentication Functionality
- Close any open Chrome incognito windows
- Open a new Chrome window if not already open
- Right click the “ADFS Demo App” shortcut and open a new incognito window
- Click Sign in using an X.509 certificate
- Note that you can configure ADFS extranet authentication settings to perform certificate authentication automatically. The ADFS server in this lab is setup to allow both forms and certificate authentication.
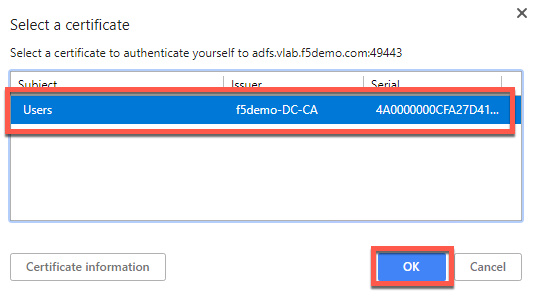
- The certificate is already selected, click OK.
- You should see a set of claims displayed in the claims app at app.vlab.f5demo.com
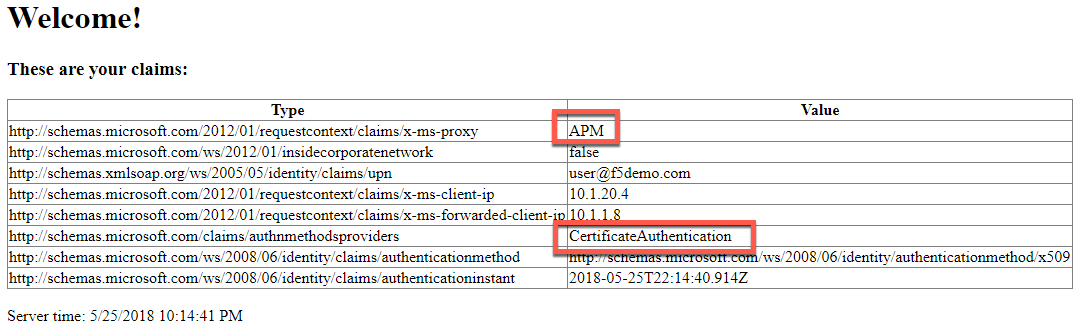
- Note that ADFS now ADFS has identified the authentication type as CertificateAuthentication
- What happened:
- You made a request to App
- App redirected you to ADFS for authentication
- The BIG-IP received the request and load balanced it to one of the ADFS servers, as well as communicated data about the traffic using MS-ADFSPIP.
- The ADFS server determined that you should be authenticated using the extranet policy and sent back a logon page which the BIG-IP forwarded on to you.
- You selected the Certificate Authentication, which caused you to be redirected to port 49443 where the BIG-IP performed certificate authentication
- BIG-IP forwarded on details about your authentication using MS-ADFSPIP to the ADFS server
- ADFS redirected you back to App with a WS-Fed assertion
- App validated the assertion and displayed the claims it received from ADFS
Review the ADFS Proxy Configuration
Go to Local Traffic -> Virtual Servers
Notice there are two adfs-proxy virtual servers deployed, one on port 443 and one on port 49443
- 443 is for ADFS traffic
- Pool members use port 443
- 49443 is for client certificate auth support
- Pool members use port 443
- This is different from the load balancing only, which pointed to port 49443. This is because the certificate auth is not passing through, BIG-IP is performing the certificate auth, then sending the data along to ADFS using MS-ADFSPIP.
- Pool members use port 443
- Click on the virtual server adfs-proxy_adfs_vs_443
- Scroll down and examine the Access Policy -> ADFS Proxy
configuration item
- Note that ADFS Proxy functionality is enabled and a trust is established. The BIG-IP will auto-renew this prior to expiration.
- Note that no Access Profile is deployed. You can add one if desired for additional security. The iApp is capable of deploying it, along with the required bypass iRule for some URLs like the metadata sharing URL.
- Scroll down and examine the Access Policy -> ADFS Proxy
configuration item
- Go to Local Traffic -> Profiles -> SSL -> Server and click
adfs-proxy_server-ssl
- Note that a certificate and key are used on the server side. These are created as part of establishing the trust with the ADFS server as noted in the previous step and then automatically input here.
- This is shared by both the 443 and the 49443 virtual servers because they need the same settings to communicate with ADFS.
- Change configuration mode to advanced
- Note that the server name field contains adfs.vlab.f5demo.com. ADFS requires SNI and this is how you configure it on the serverssl profile.
- Go to Local Traffic -> Profiles -> SSL -> Client and click
adfs-proxy_client-ssl-cert-auth
- This is the SSL profile that provides certificate auth on the port 49443 virtual server.
- Note that Client Certificate is set to required and the Trusted Certificate Authorities is set to f5demo-DC-CA.
- You could use Advertised Certified Authority here if you wanted the client to only display certificates generated by a specific CA. This could be your primary CA, or even a specific subordinate CA if you wanted to issue client certificate auth user certificates from a specific CA to reduce the number shown to the user.
- 443 is for ADFS traffic