Lab – Create an APM Policy
This lab will teach you how to create a basic APM Policy using the GUI. Estimated completion time: 20 minutes
Task - Setup Virtual Server
|
 |
|
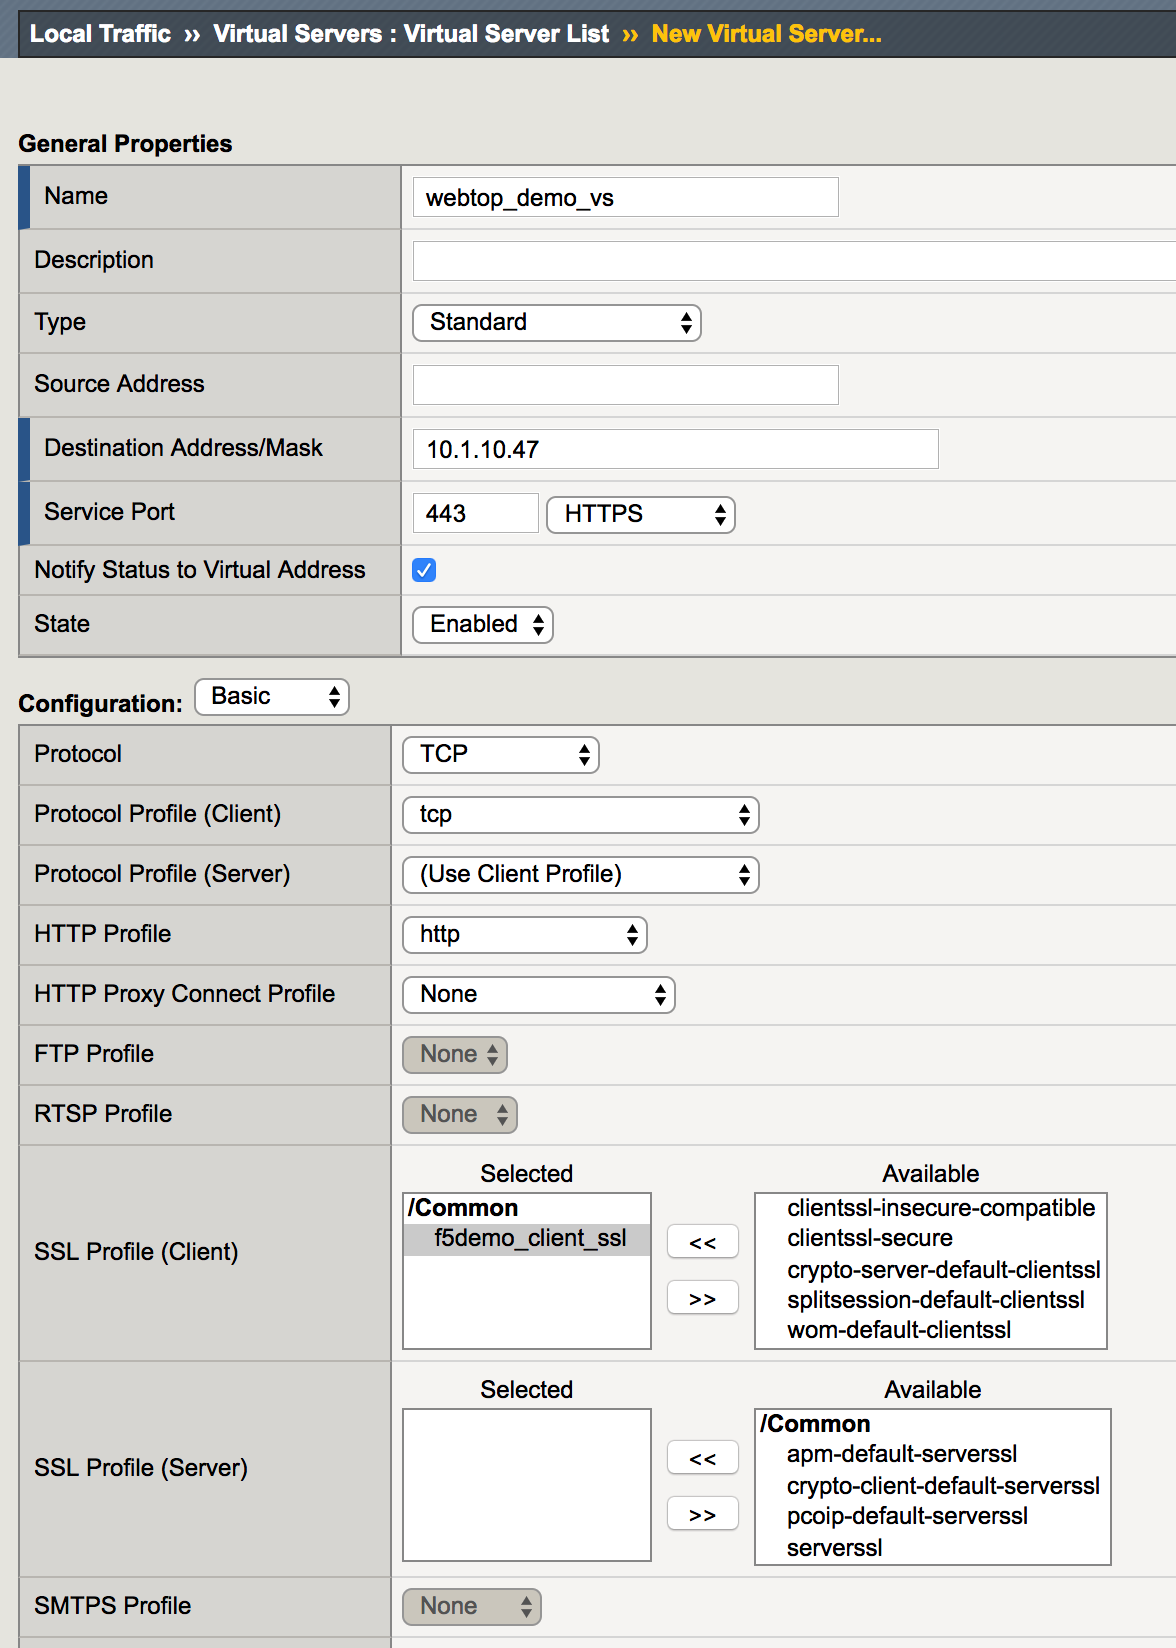 |
Task - Create a Connectivity Profile
| 1. Go to Access -> Connectivity/VPN -> Profiles -> Add |  |
|
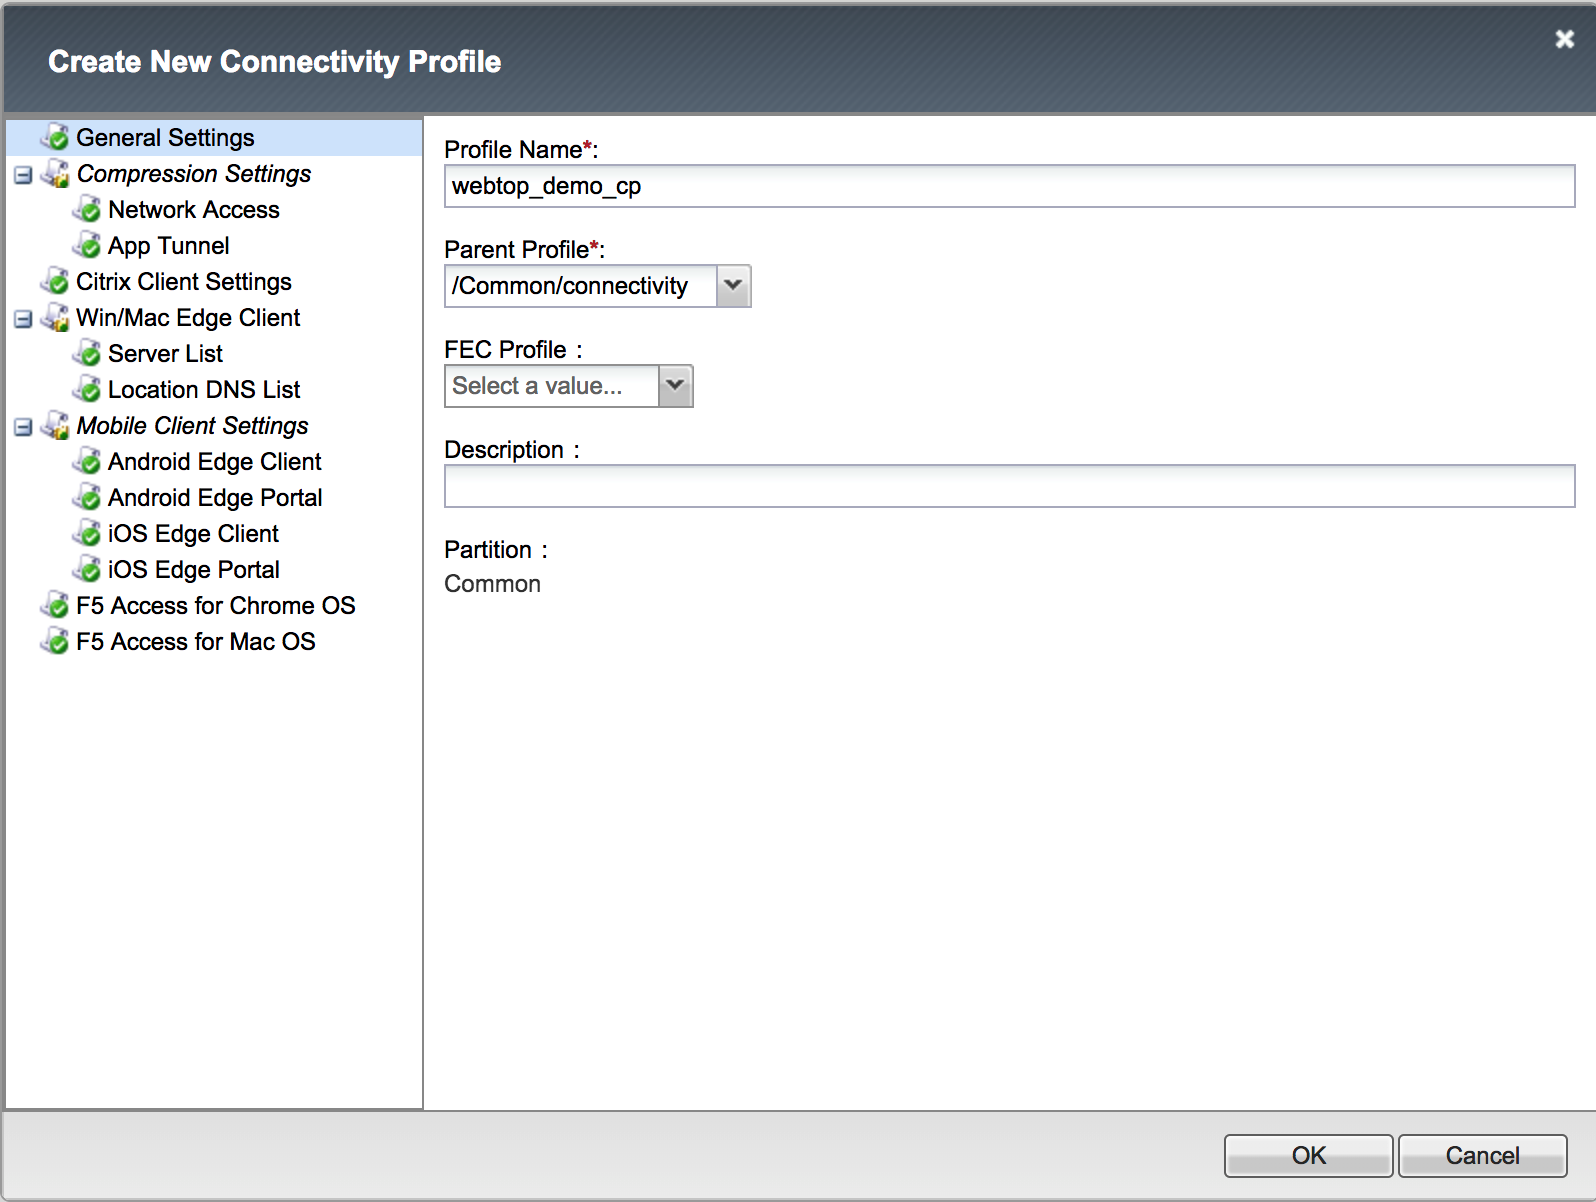 |
Task - Create an AD Server as AAA
| 1. Go to Access -> Authentication -> Active Directory -> Create |  |
|
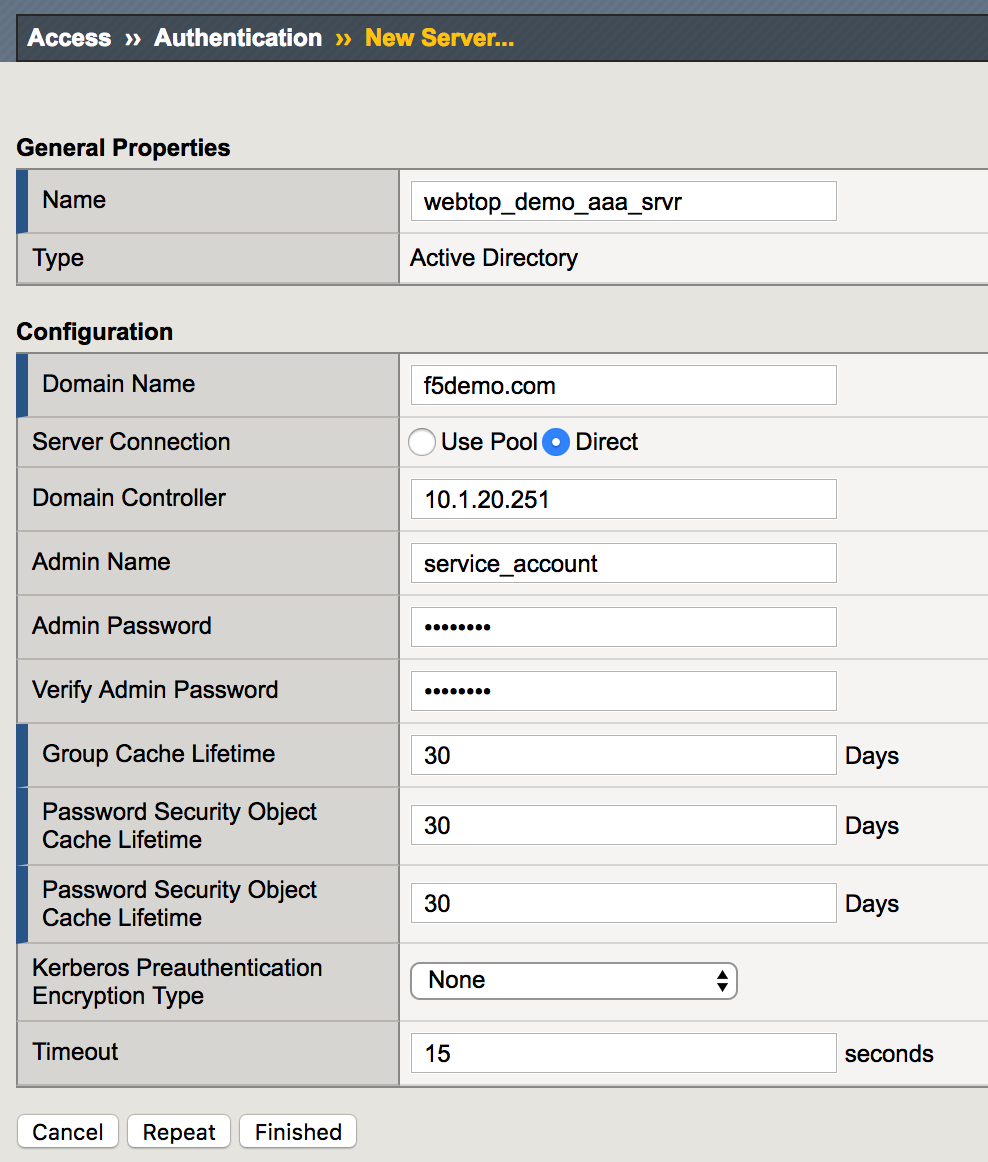 |
Task - Create a container (webtop)
| 1. Go to Access -> Webtop -> Webtop Lists -> Create |  |
|
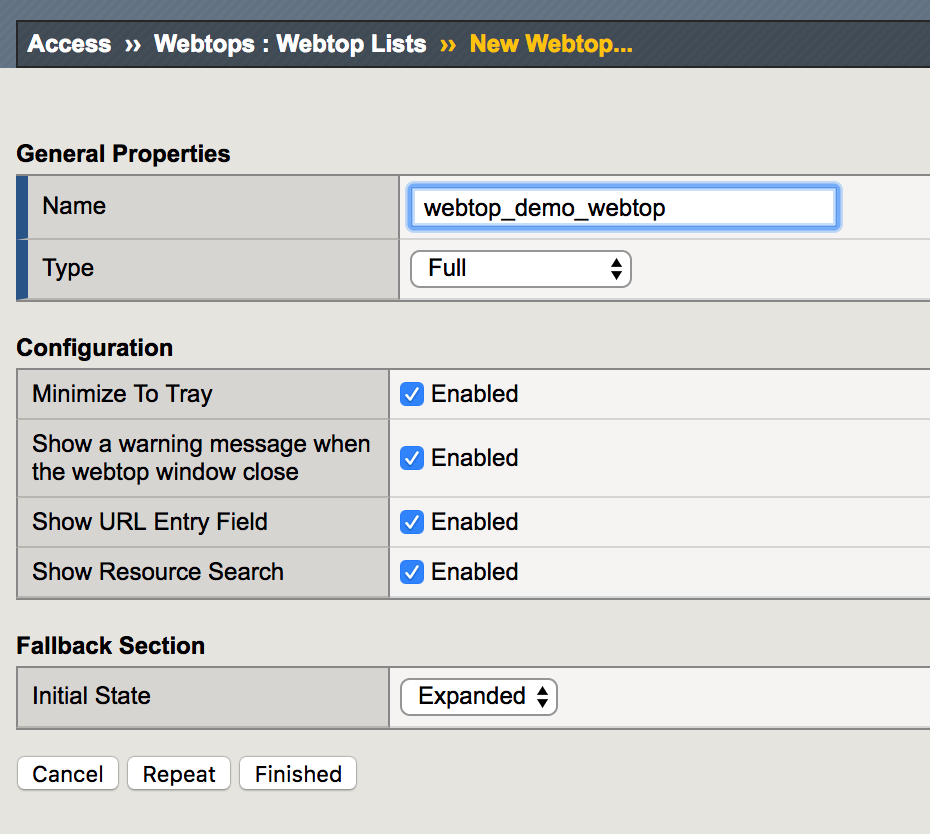 |
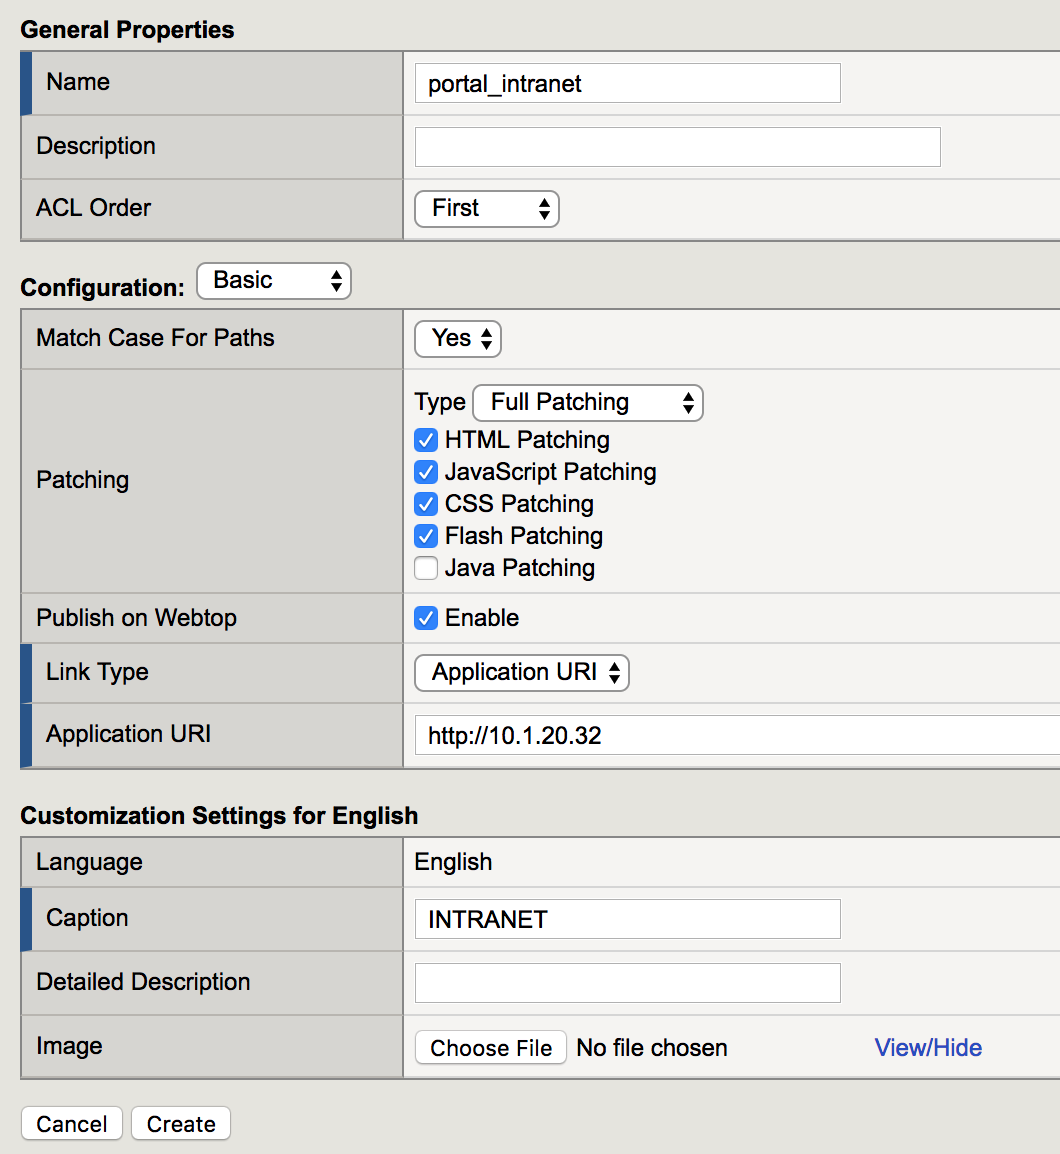
Task - Create a Portal Access
| 1. Go to Access -> Connectivity/VPN: Portal Access List -> Create |  |
|
 |
Task - Setup APM Profile
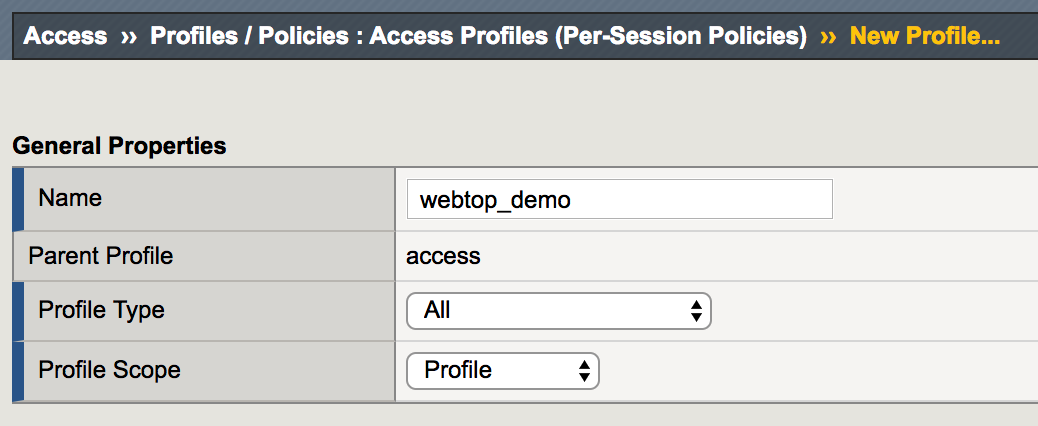
| 1. Go to Access -> Profiles / Policies -> Access Profiles (Per Session Policies) -> Create |  |
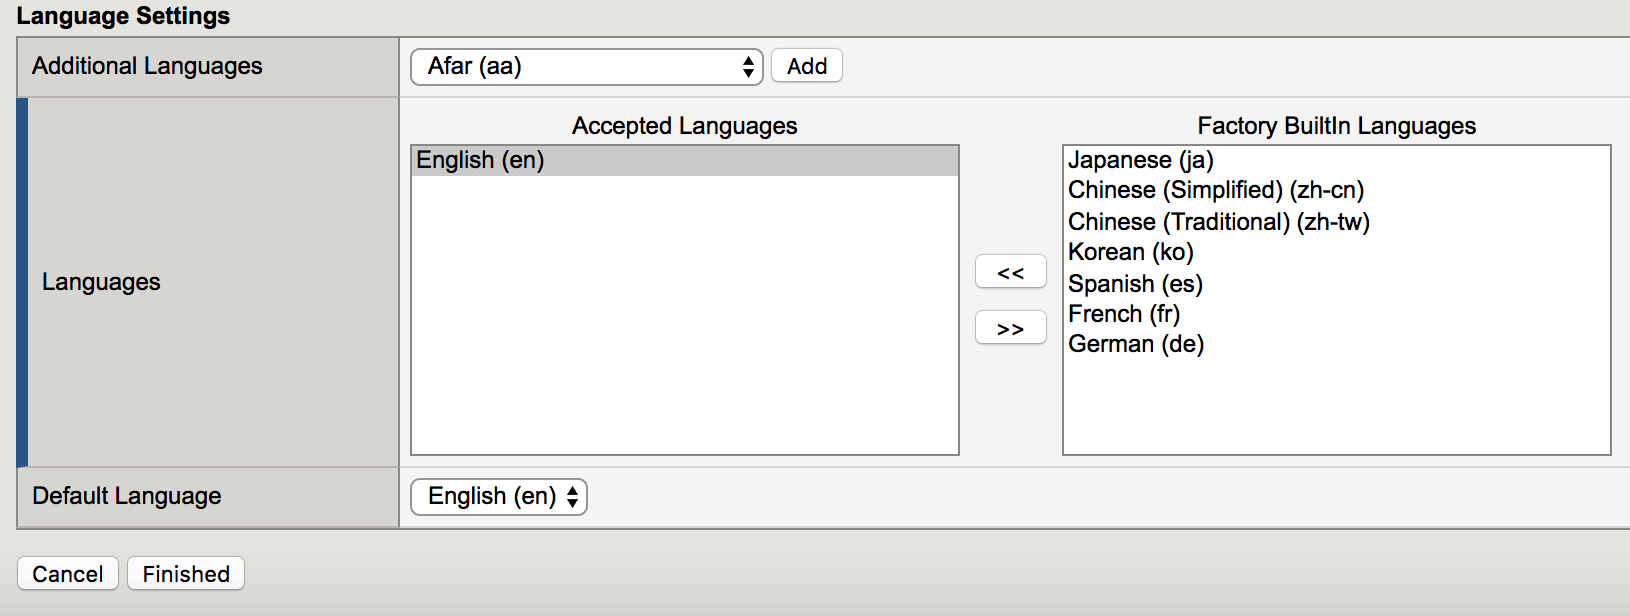
2. Enter the following values (leave others default) then click Finished
|
|
| 3. Click Edit for webtop_demo, a new browser tab will open |  |
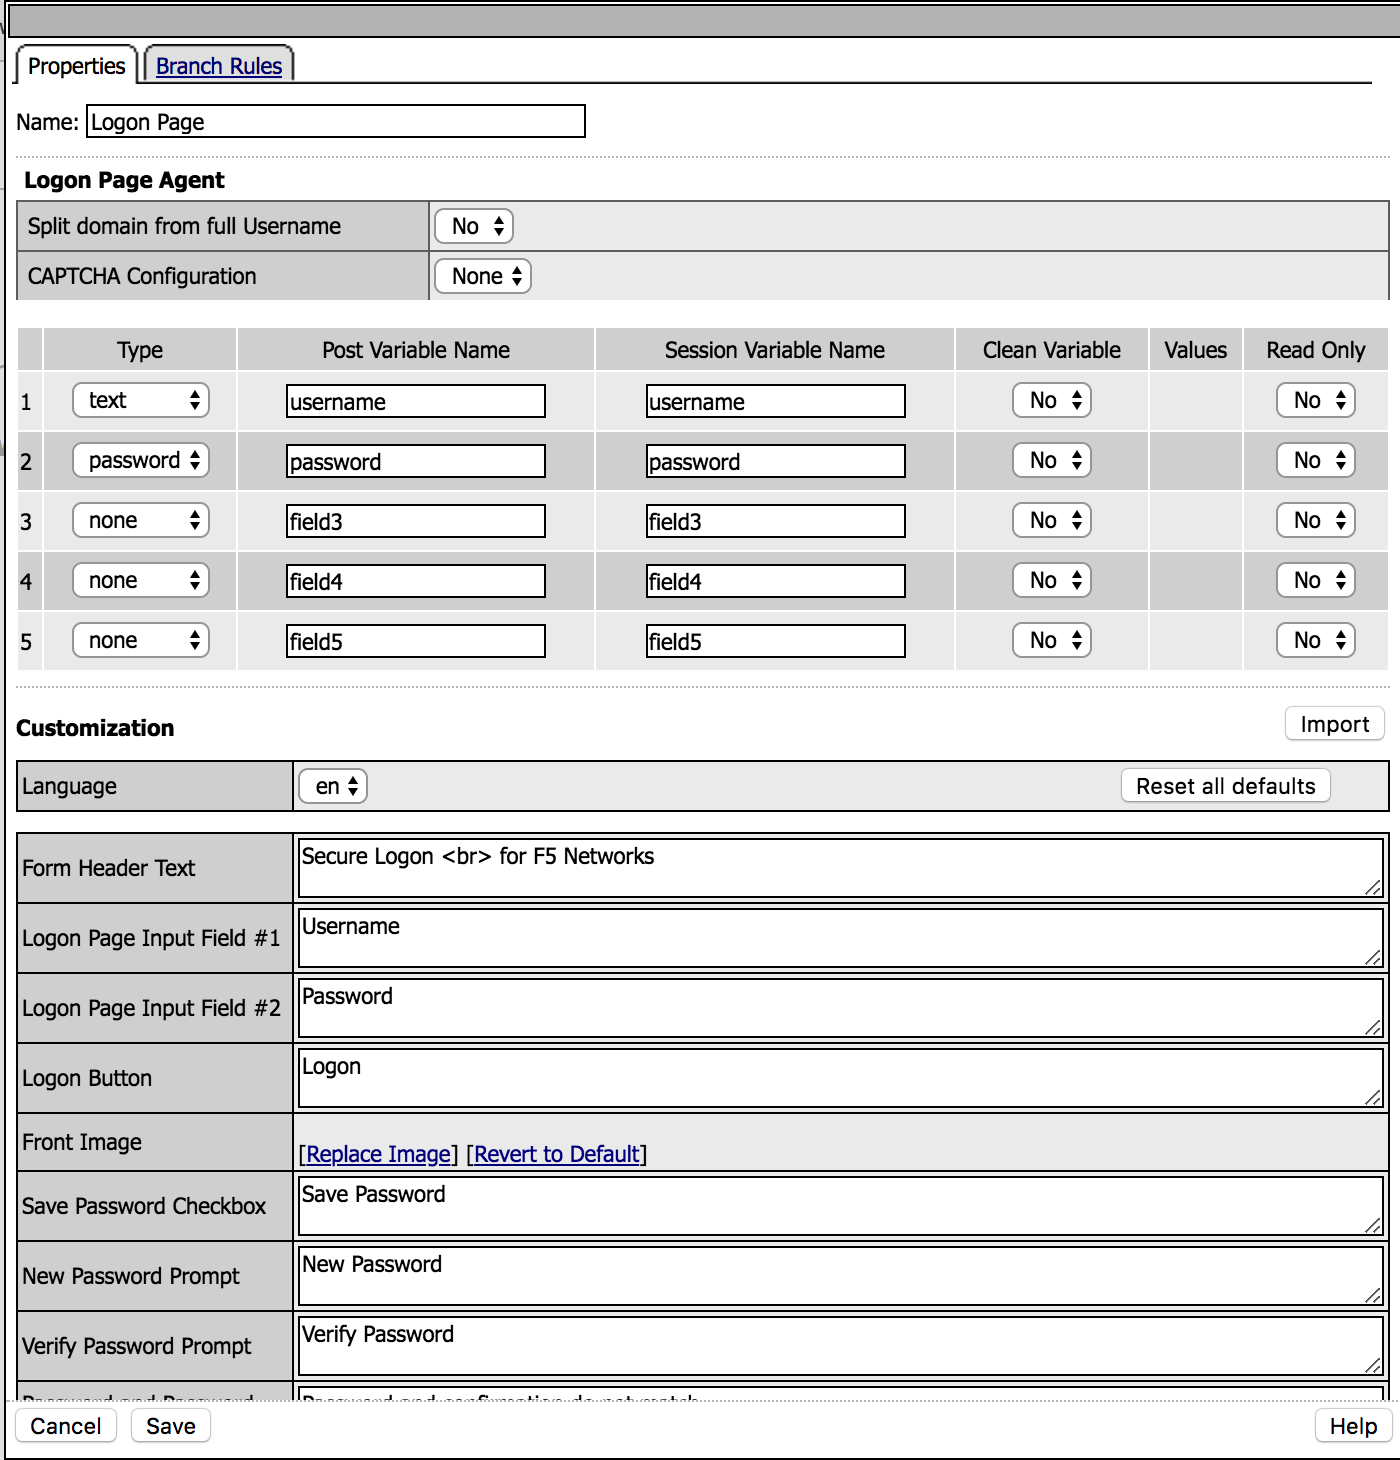
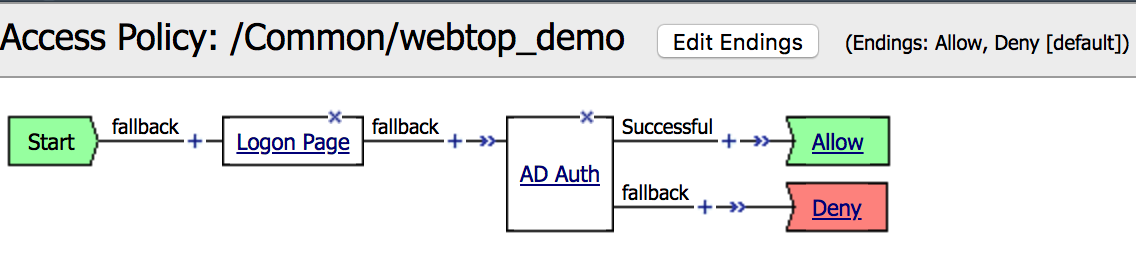
4. Click the + between Start and Deny, select
Logon Page from the Logon tab, click Add Item |
|
5. Enter the following values (leave others default) then click Save
|
 |
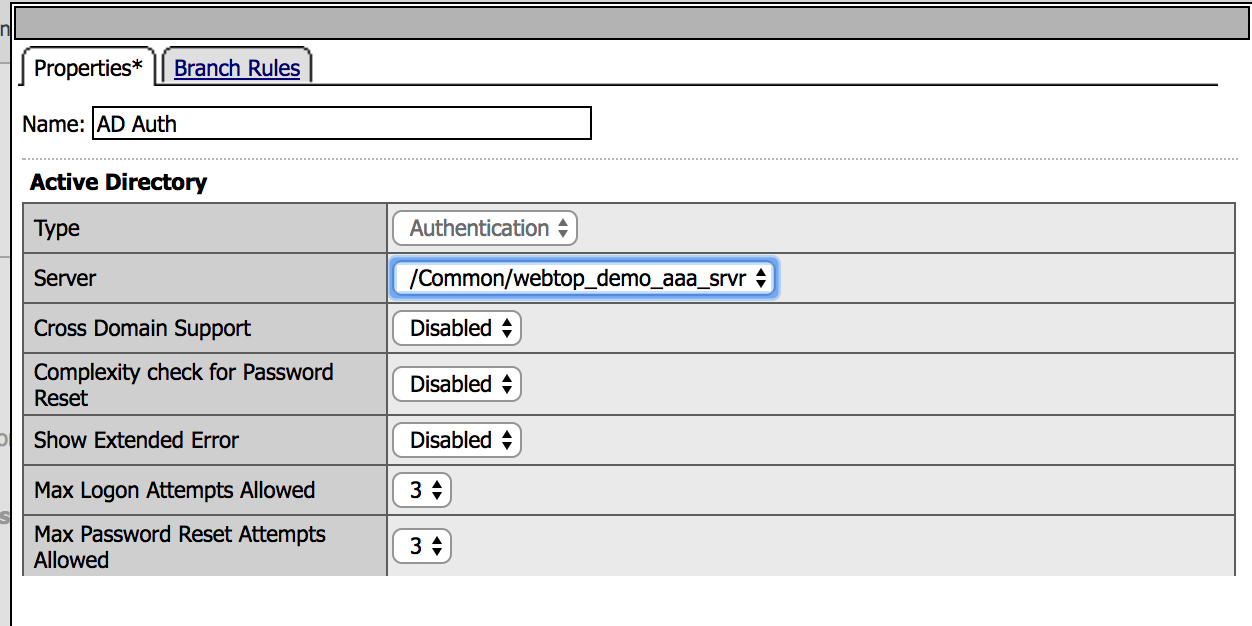
6. Click the + between Logon Page and Deny,
select AD Auth from the Authentication tab,
click Add Item |
 |
7. Change the Server to /Common/webtop_demo_aaa_srvr,
then click Save |
 |
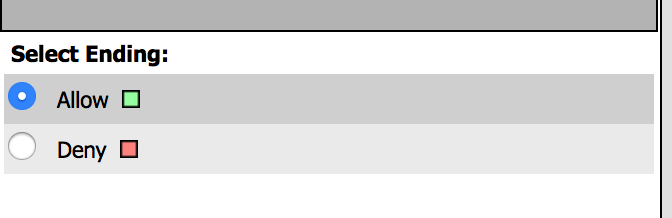
| 8. Change the AD Auth Successful branch ending to Allow, then click Save |
|
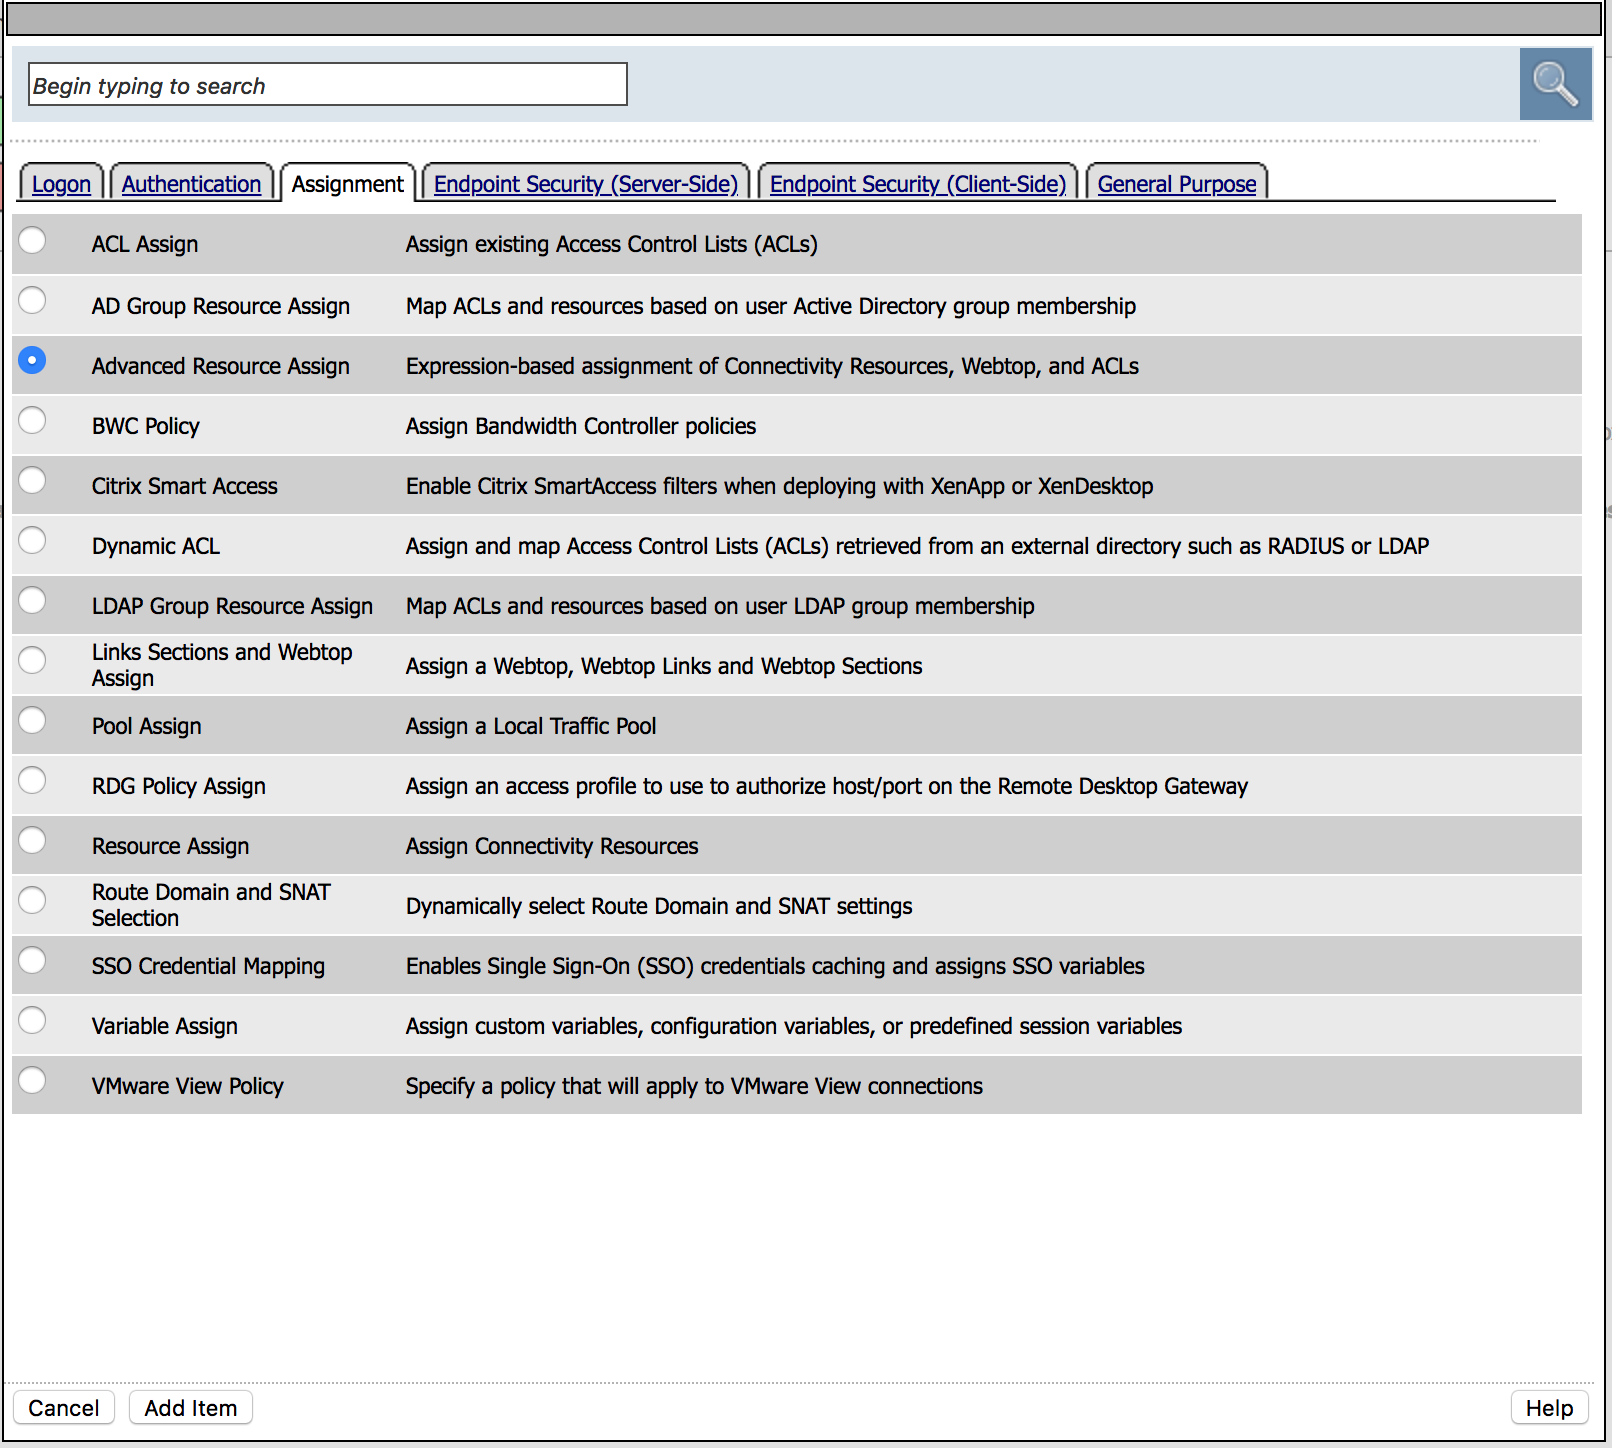
9. Click the + between AD Auth and Allow,
select Advanced Resource Assign from the Assigment tab,
click Add Item |
 |
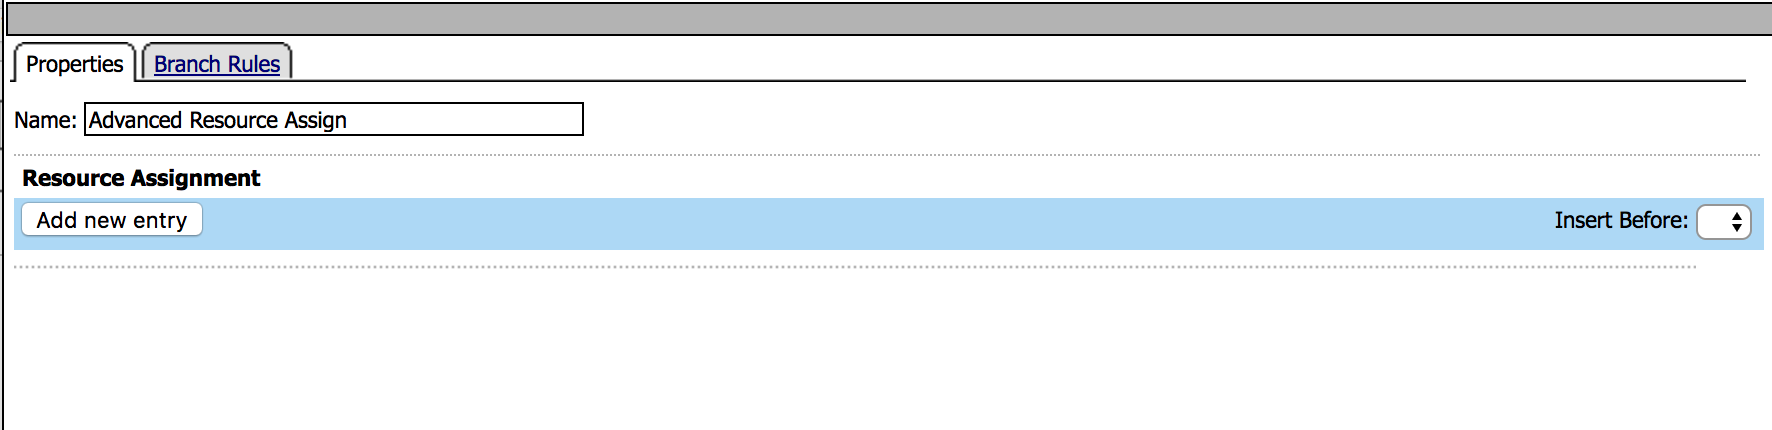
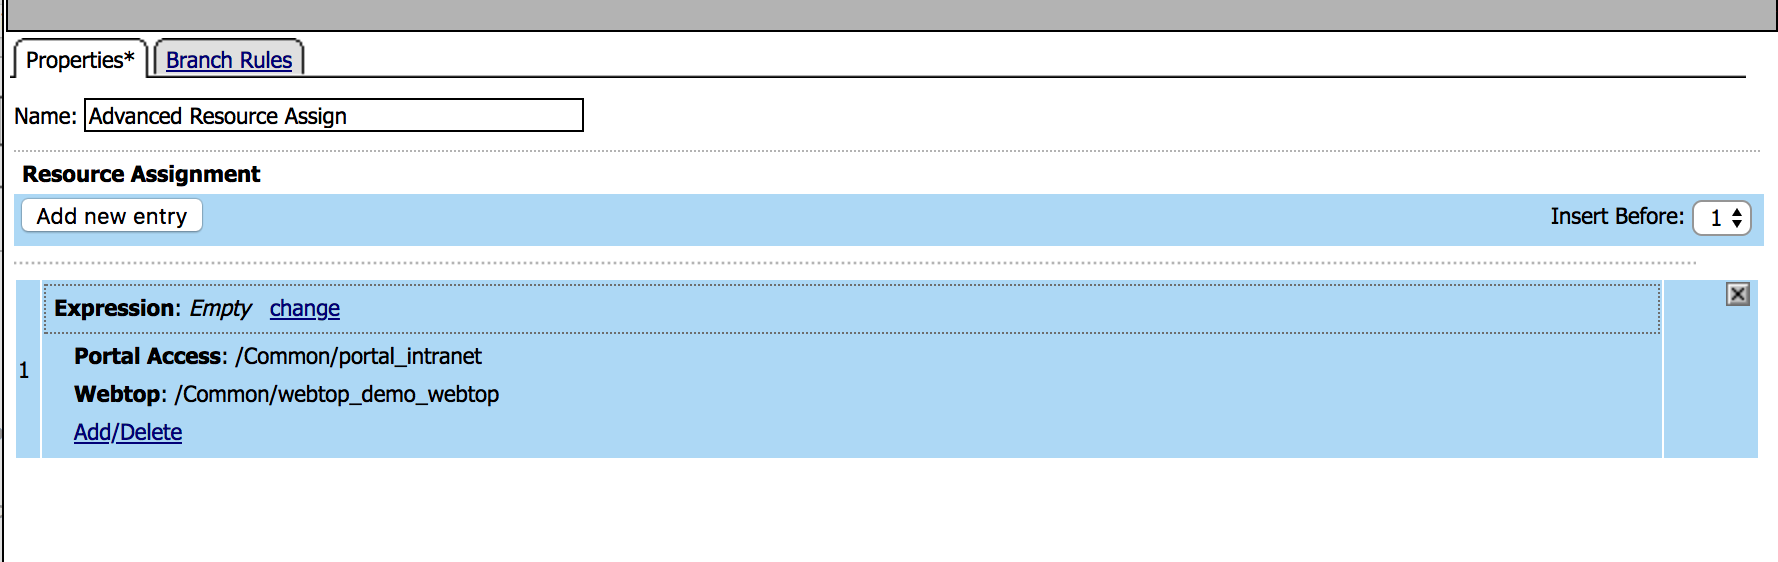
10. Click on Add new Entry, then for the new Expression, click Add/Delete. Add the following resources, and then click Update and Save
|
|
| 11. Click Apply Access Policy in the top left and then close the browser tab | 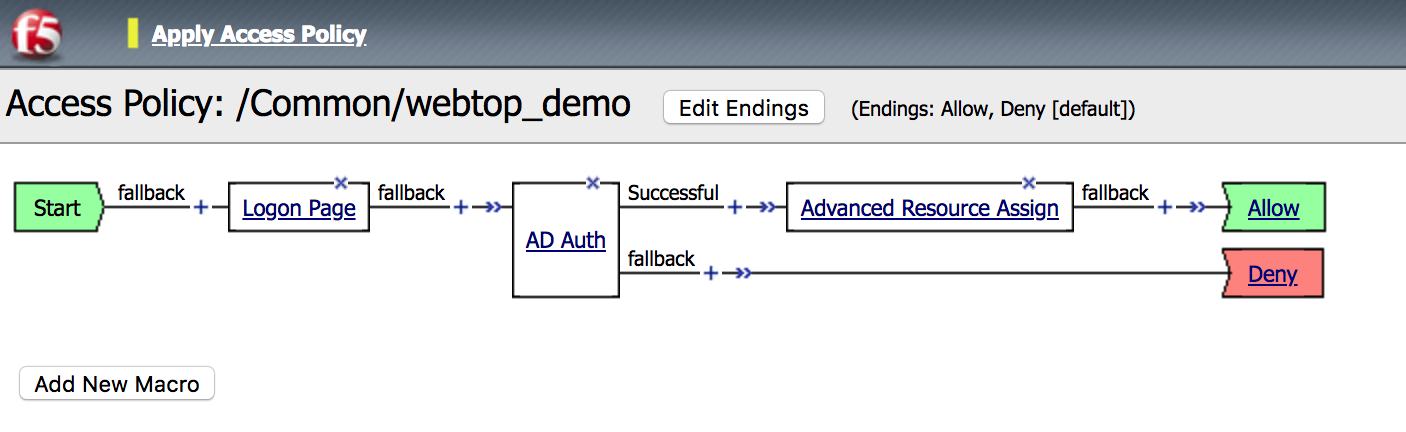 |


Task - Add the Access Policy to the Virtual Server
| 1. Go to Local Traffic -> Virtual Servers -> webtop__demo_vs |  |
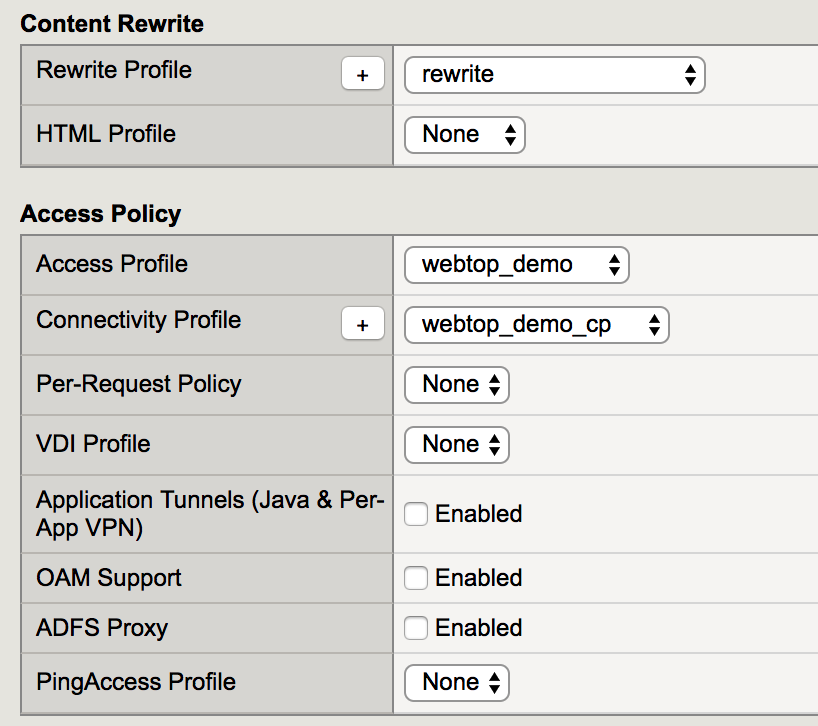
2. Modify the Rewrite Profile setting to rewrite,
Access Profile to webtop_demo and
Connectivity Profile to webtop_demo_cp,
then click Update |
 |
3. Test access to
|