Lab 1.7: Create the Virtual Server

digraph breadcrumb { rankdir="LR" ranksep=.4 node [fontsize=10,style="rounded,filled",shape=box,color=gray72,margin="0.05,0.05",height=0.1] fontsize = 10 labeljust="l" subgraph cluster_provider { style = "rounded,filled" color = lightgrey height = .75 label = "BIG-IP APM" idp [label="IDP",color="palegreen"] spconnector [label="SP Connector",color="palegreen"] bind [label="Bind Connectors",color="palegreen"] resource [label="SAML Resource",color="palegreen"] webtop [label="Webtop",color="palegreen"] profile [label="Access Profile",color="palegreen"] vs [label="VS",color="steelblue1"] test [label="Test"] idp -> spconnector -> bind -> resource -> webtop -> profile -> vs -> test } }

In order to access almost anything through an F5 BIG-IP, you must define a Virtual Server. The Virtual Server listens on the specified address and handles the requests either by making a load balancing decision or prompting for a logon (or both!).

Task 1 - Create the Virtual Server
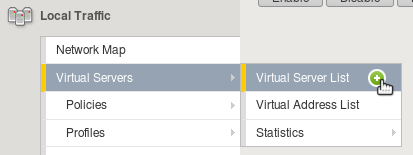
  1. Navigate to Local Traffic ‣ Virtual Server List

  2. Click the + sign

    image21

  1. Configure the General Properties settings:

    General Properties
    Property Value
    Name idp.f5demo.com
    Destination Address/Mask 10.1.10.101
    Service Port 443

    image22

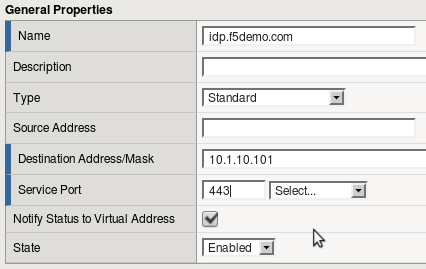
  2. Configure the Configuration settings:

    Configuration
    Property Value
    HTTP Profile http
    SSL Profile (Client) idp.f5demo.com-clientssl
    SSL Profile (Server) serverssl

    image23

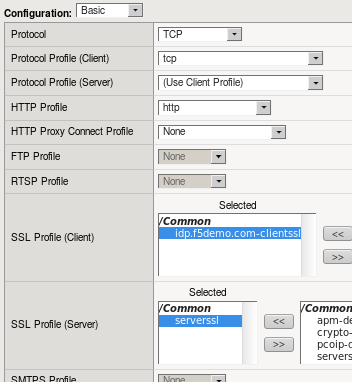
  3. Configure the Access Policy settings:

    Access Policy
    Property Value
    Access Profile idp.f5demo.com

    image24

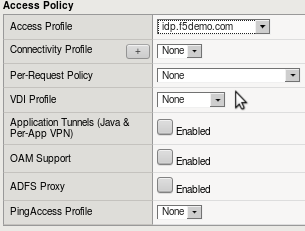
  4. Click the Finished button.